How to Apply Tile Grout Sealant Properly
Proper tile grout sealant application is a key factor in fully sealing tile joints, preventing water penetration, inhibiting mold growth, and maintaining a clean, durable tiled surface over time.
In practice, many tiled surfaces deteriorate quickly not because of poor materials, but due to incorrect application techniques. When grout joints are not properly treated, water can seep underneath, causing stains, mold, peeling, or cracking within a short period.
On the other hand, when applied correctly, grout lines will:
Adhere firmly to the joints
Appear even, clean, and aesthetically pleasing
Maintain durability with minimal cracking or peeling over time
Quick Summary: 5 Steps for Proper Tile Grout Application
To achieve optimal results, follow this standard process:
Clean and dry the tile joints
Prepare the sealant and necessary tools
Apply the sealant evenly along the joints
Smooth and press the sealant into place
Clean the surface before the sealant cures
This process ensures effective waterproofing and long-term durability.

1. What is tile grout sealant and why is it important?
Tile grout sealant is a material used to fill and seal the gaps between tiles after installation.
Although grout lines occupy a small area, they directly affect:
Waterproofing performance
Overall durability of floors and walls
Aesthetic quality of the surface
When applied correctly, grout sealant forms a tight bond that prevents water infiltration, reduces mold growth, and keeps grout lines clean and consistent in color.
Conversely, improper application—especially on damp or dirty surfaces—can lead to early failure, including cracking, peeling, or discoloration.
2. Is Intersil E grout sealant a good choice?
Among various options available, Intersil E grout sealant by An Thai Khang is a two-component product designed for higher performance applications, especially in areas requiring strong waterproofing and long-term durability.
Its key strength lies in forming a stable and durable bond after curing.
Notable advantages include:
Strong adhesion for firm and stable joints
Effective waterproofing performance
Resistance to mold and discoloration
Smooth and visually appealing finish
Compatibility with various tile types and applications
This product is commonly used in residential homes, apartments, hotels, and high-moisture areas such as bathrooms and kitchens.
3. How to apply tile grout sealant properly (step-by-step guide)
To ensure the best performance, the application process must be carried out correctly from the beginning. Below is a detailed step-by-step guide.
3.1 Clean and dry the tile joints
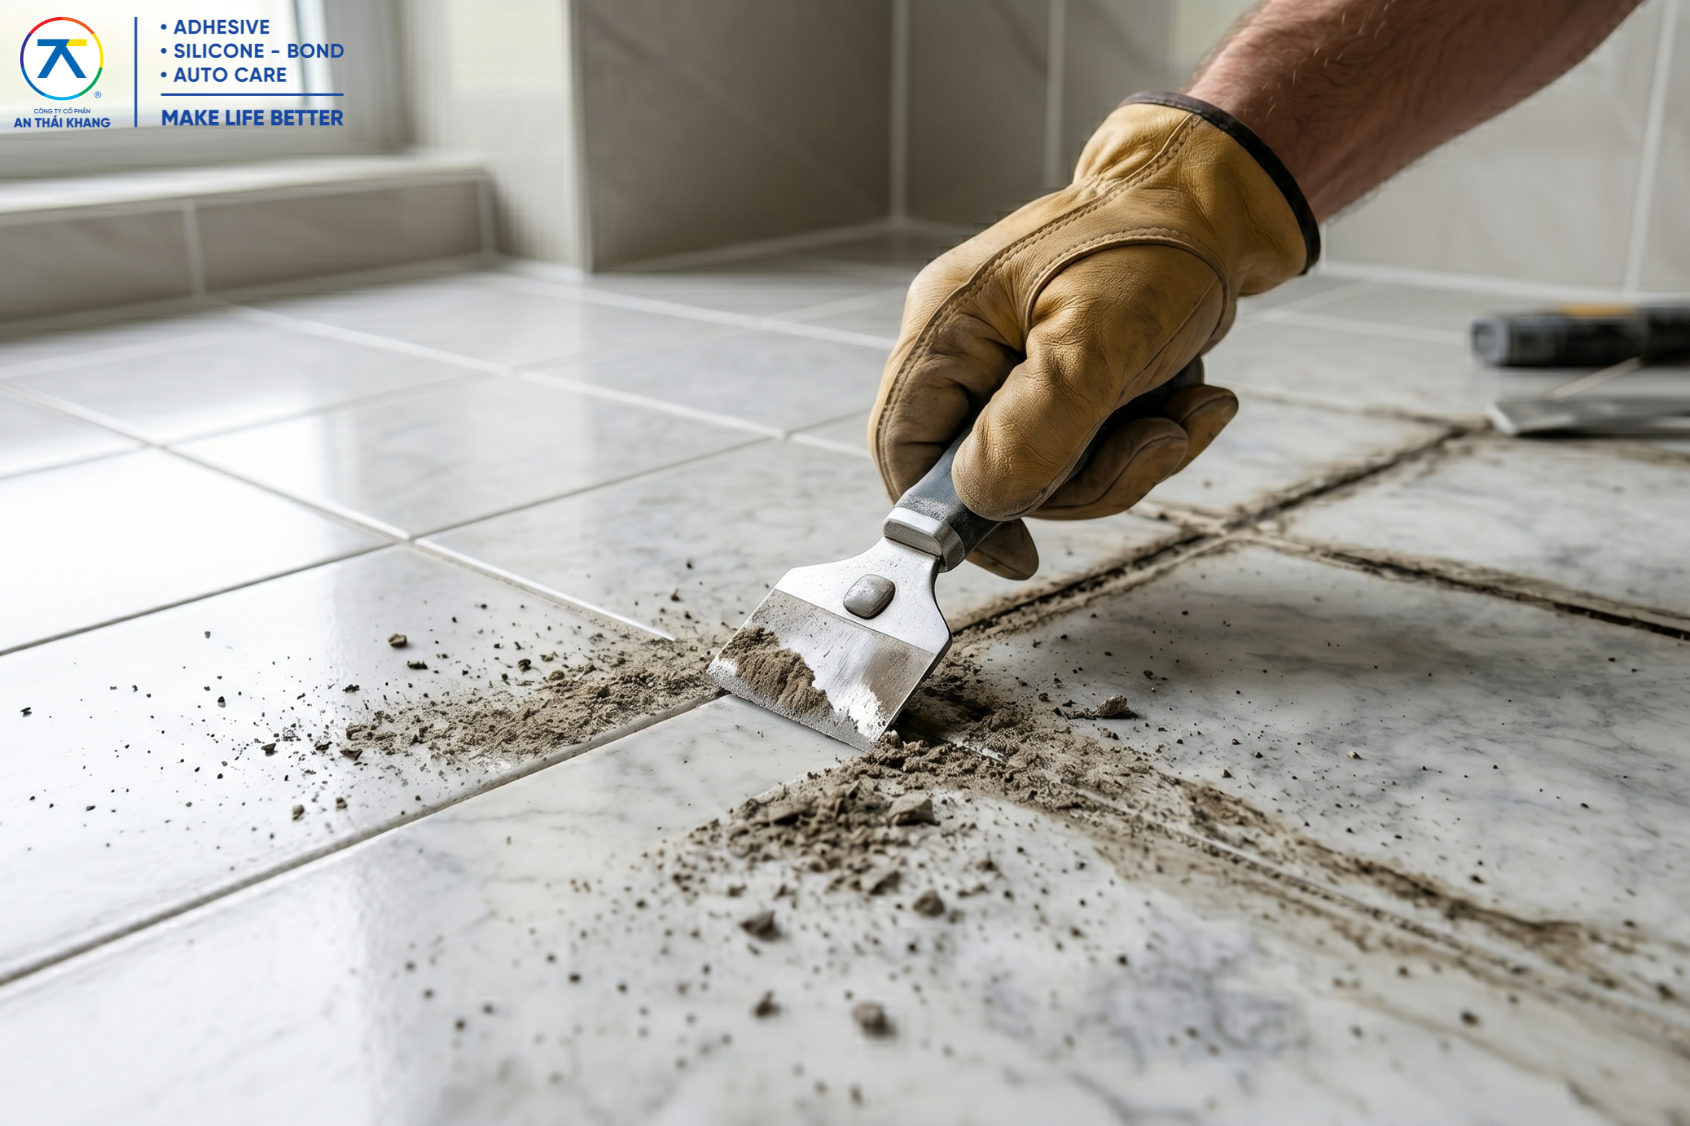
Before applying the sealant, the joints must be thoroughly cleaned.
Remove:
Dust and debris
Cement residue
Grease or contaminants
Any remaining moisture
If necessary, create a joint depth of around 2 mm to improve adhesion.
A proper surface must be clean, dry, and free of contaminants. This step directly affects the durability of the grout line.
3.2 Prepare materials and tools
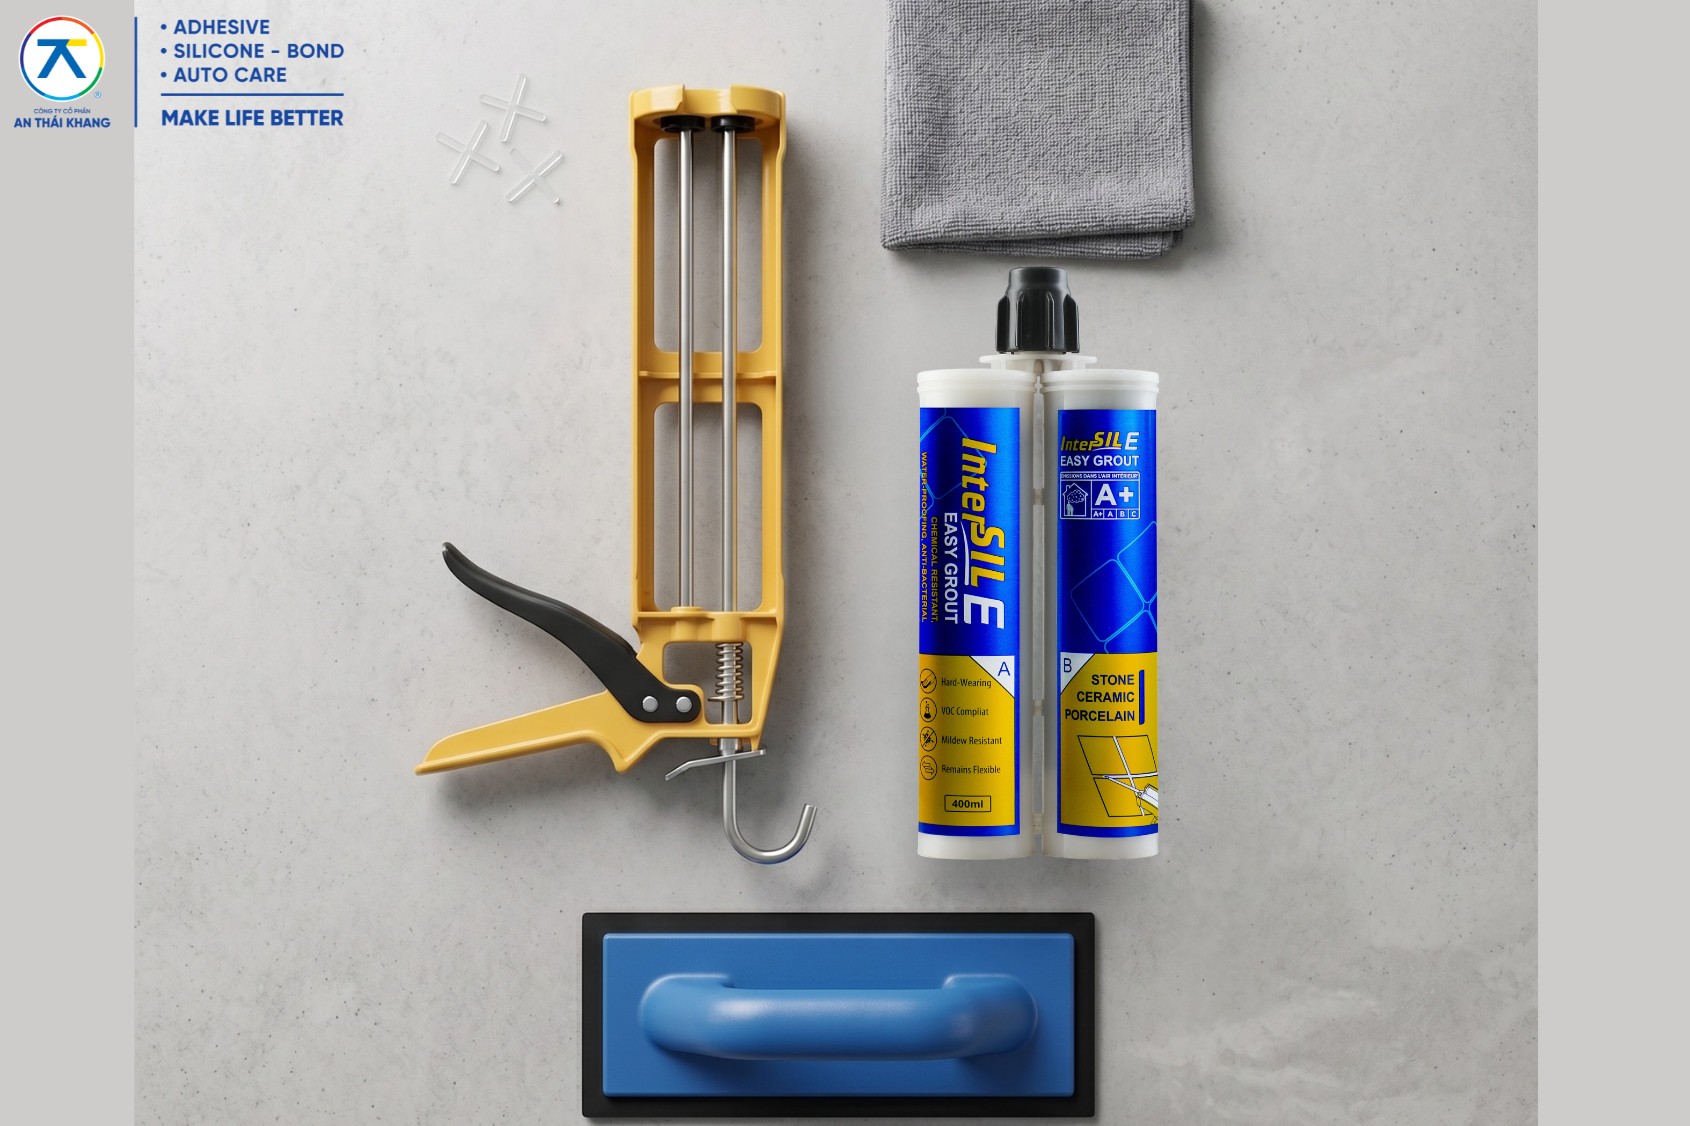
To apply grout sealant correctly, prepare the following:
Grout sealant (preferably two-component)
Caulking gun
Grout finishing tool or rubber spatula
Damp cloth for cleaning
Scraper (if excess sealant needs removal)
For two-component sealants like Intersil E, ensure the cartridge is properly installed to allow consistent mixing and flow.
3.3 Apply sealant evenly along the joint
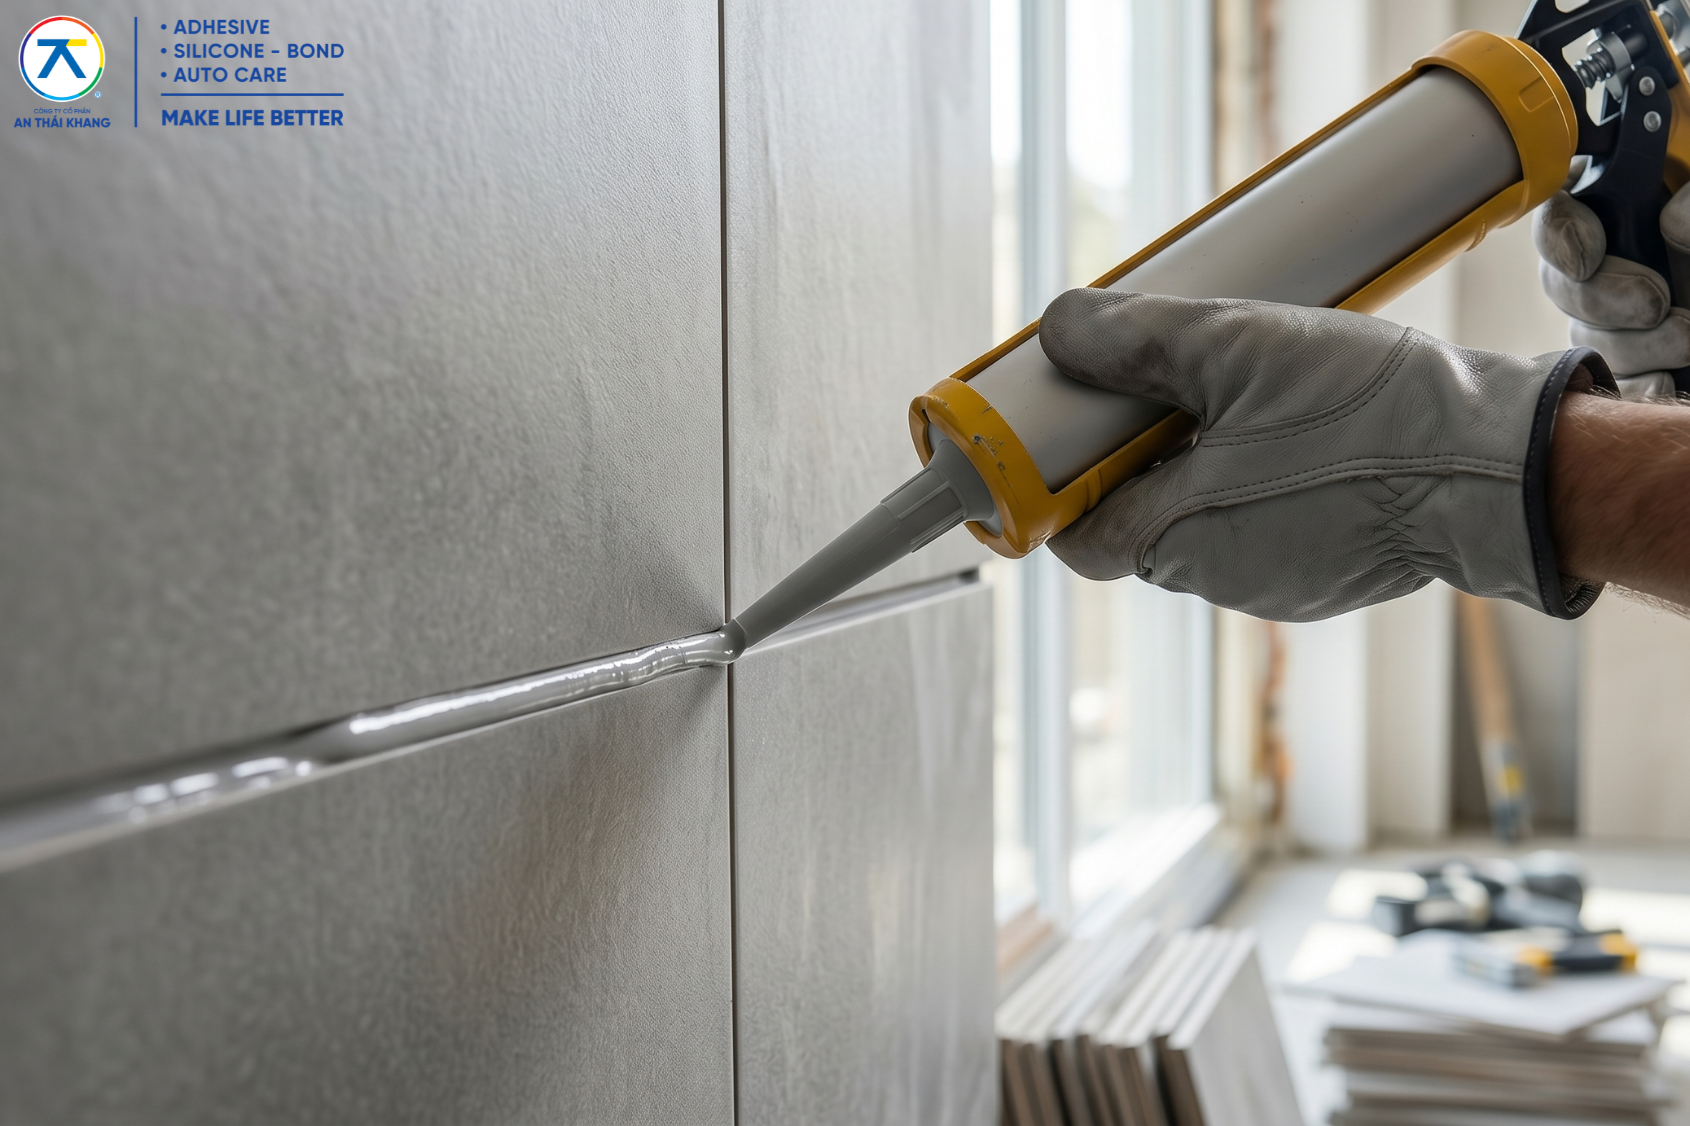
Place the nozzle close to the tile joint and move steadily along the line.
During application:
Maintain consistent hand pressure
Apply in a continuous motion
Avoid stopping midway
A proper sealant line should fully fill the joint, remain continuous, and not overflow excessively onto the tile surface.
3.4 Smooth and press the sealant
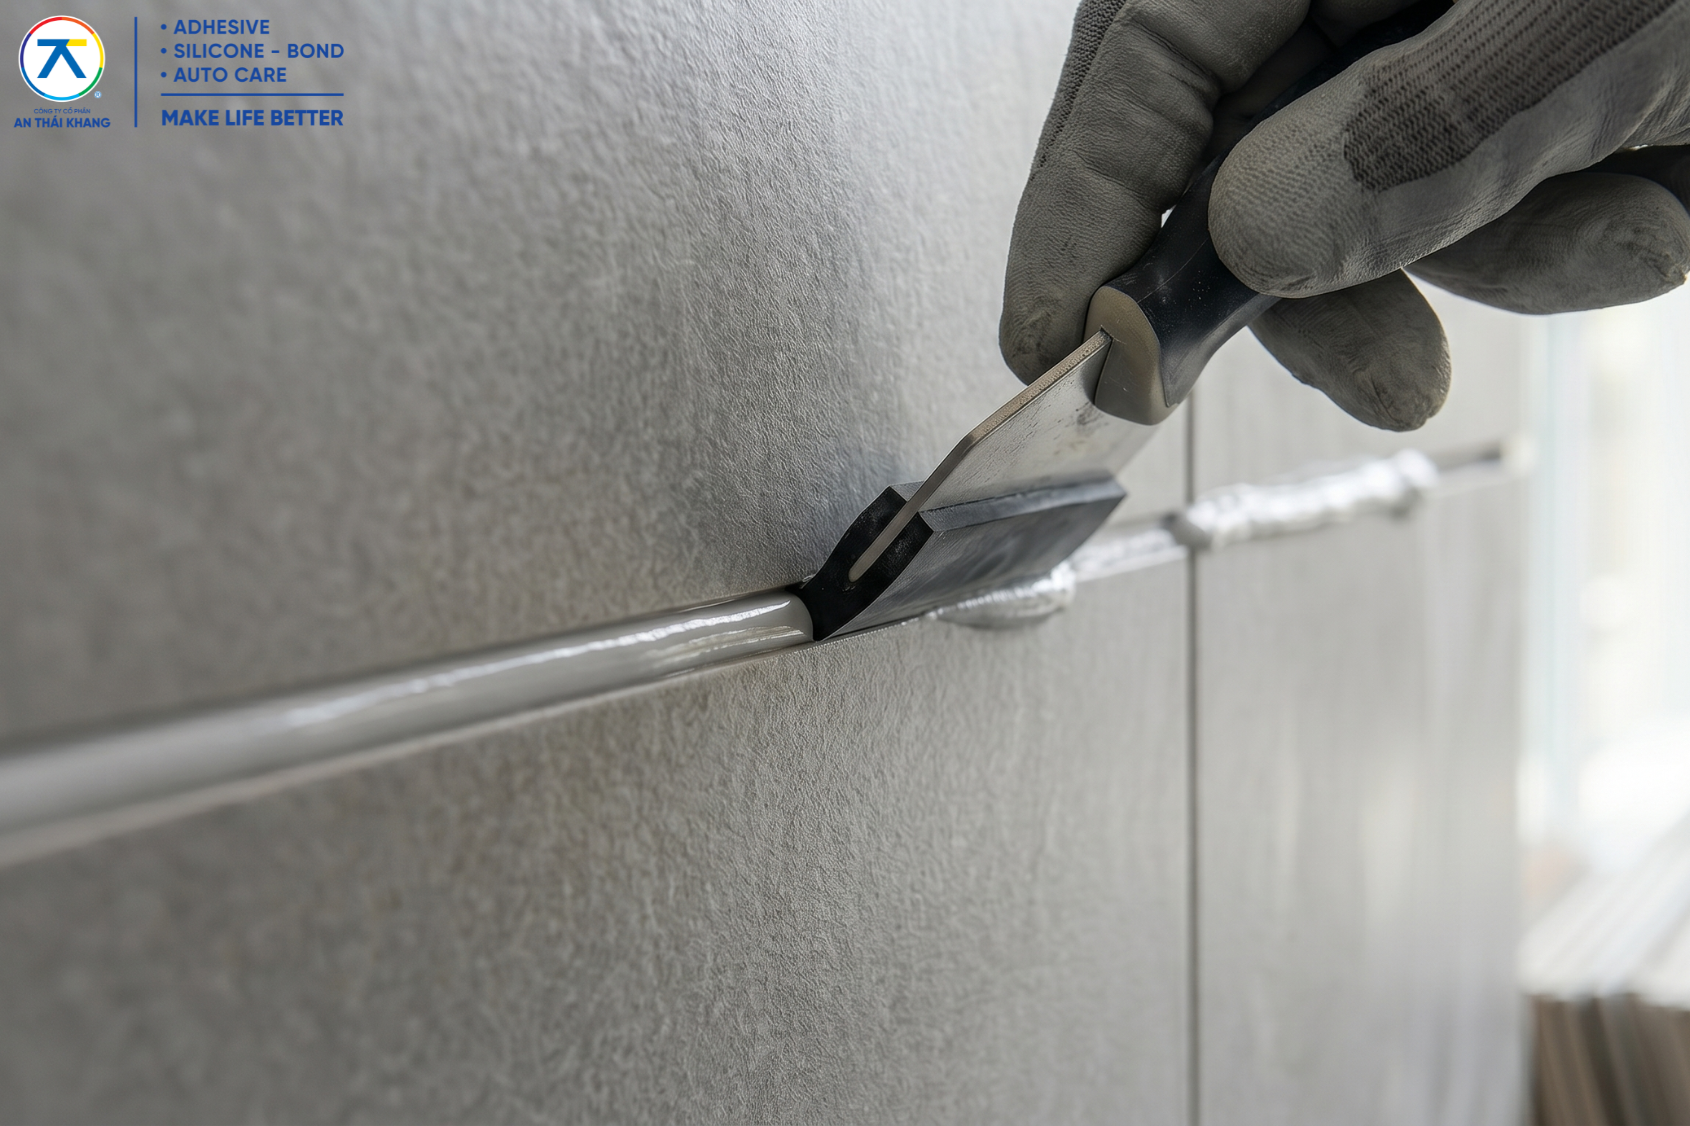
Immediately after application, smooth the sealant.
Use a grout tool or rubber spatula to:
Press the sealant deep into the joint
Create a uniform and clean surface
Remove excess material
This step is crucial for achieving a smooth finish, strong bonding, and an aesthetically pleasing grout line.
3.5 Clean the surface before curing
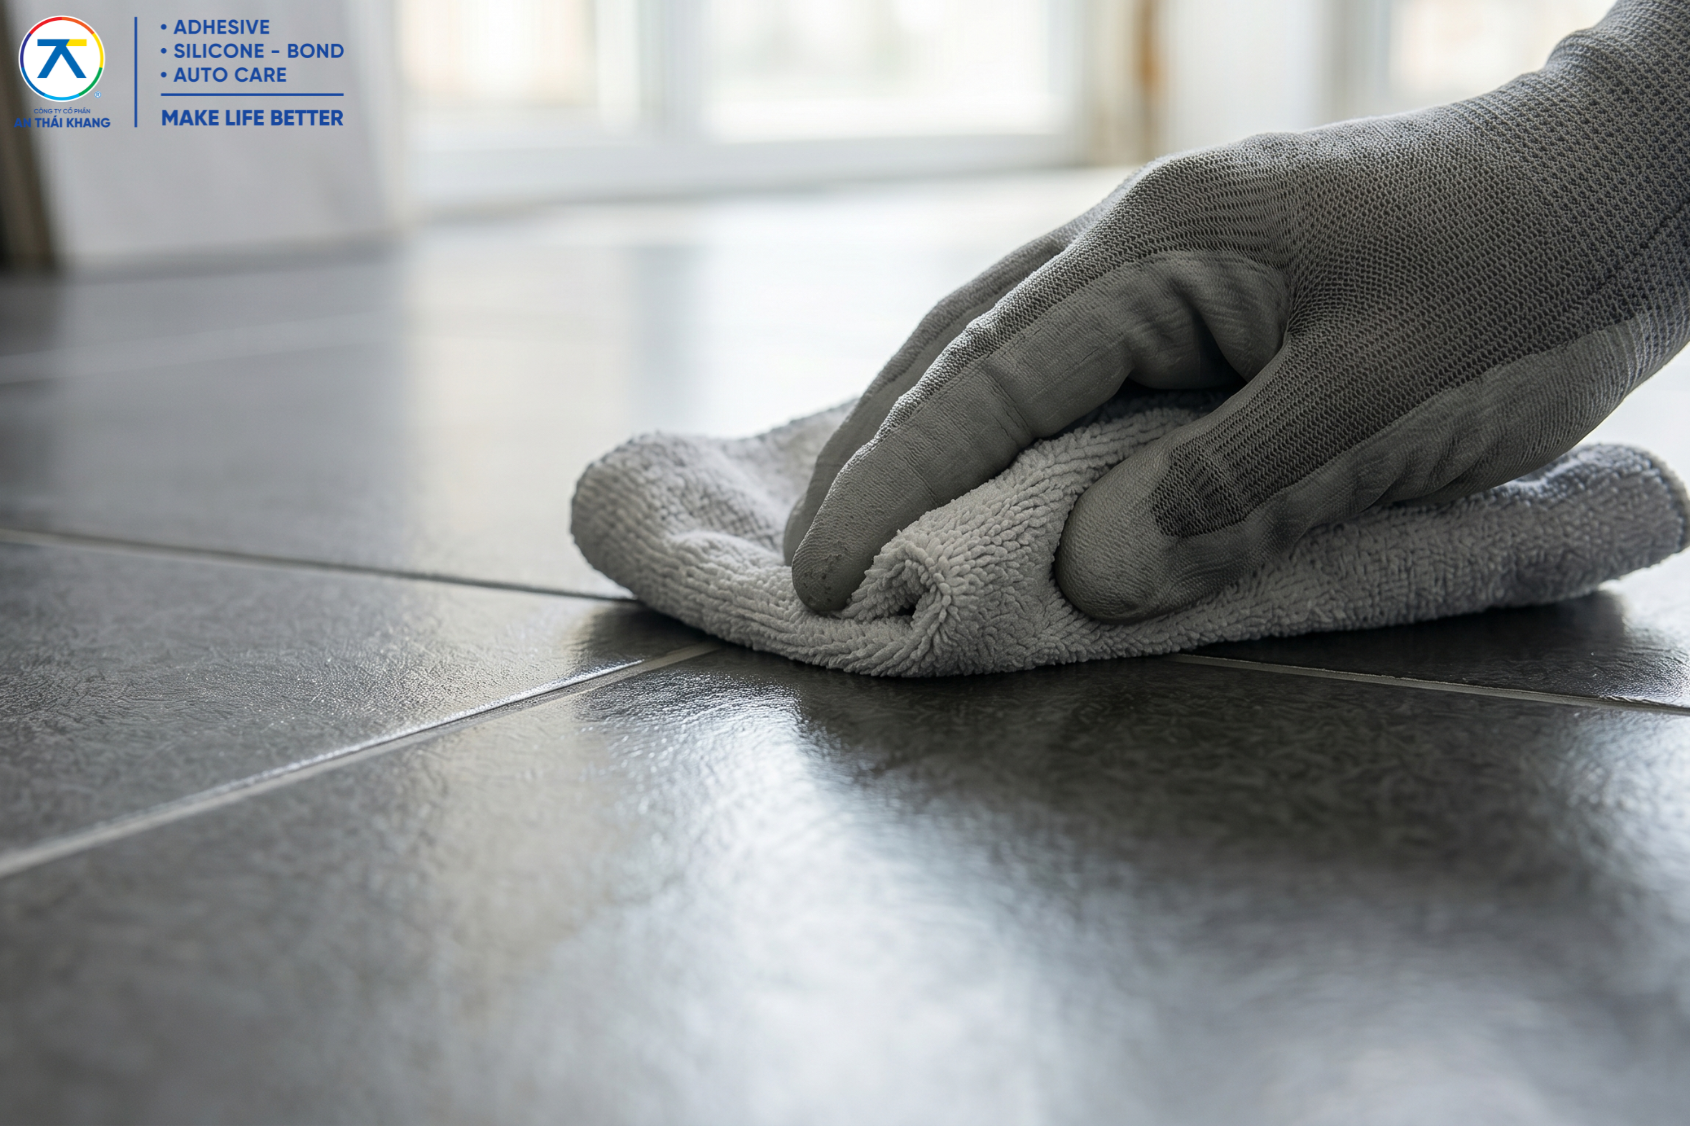
After smoothing, clean the surface promptly.
Steps:
Use a damp cloth to wipe off excess sealant
Perform cleaning while the sealant is still wet
If cleaning is delayed until after curing, it becomes more difficult and may damage the tile surface.
4. Common mistakes in grout sealant application
Even with the right product, improper technique can lead to issues.
Common mistakes include:
Applying on damp surfaces
Not cleaning the joints beforehand
Uneven application
Applying too much or too little sealant
Delayed cleaning
These errors can result in peeling, water leakage, or discoloration over time.
5. When should you use two-component grout sealant?
While not always necessary, two-component sealants are recommended in certain situations:
High-moisture areas such as bathrooms and kitchens
Projects requiring strong waterproofing
Applications demanding long-term durability
High aesthetic requirements
Compared to standard sealants, two-component products offer better durability, improved color stability, and stronger resistance to mold.
6. Important application notes
For best results, keep in mind:
Do not apply on wet surfaces
Ideal application temperature: 5–45°C
Maintain steady hand pressure during application
Work in well-ventilated areas
Avoid direct contact with skin and eyes
7. Conclusion
Understanding and applying proper grout sealant techniques not only improves waterproofing performance but also enhances durability and overall appearance of tiled surfaces.
In addition to proper technique, selecting the right product plays a critical role. For projects requiring durability, waterproofing, and clean grout lines, two-component sealants like Intersil E are a reliable choice.
AN THAI KHANG JSC
- • Fanpage: An Thái Khang JSC
- • Hotline: 0764 644 245
- • Email: support@anthaikhang.com
- • Website: https://anthaikhang.com/