How to Apply Silicone Sealant Neatly and Professionally
Learn how to apply silicone sealant neatly with a step-by-step guide covering surface preparation, nozzle cutting, proper caulking gun technique, and sealant finishing. Create smooth, straight, and durable sealant lines on glass, sinks, ceramic tiles...
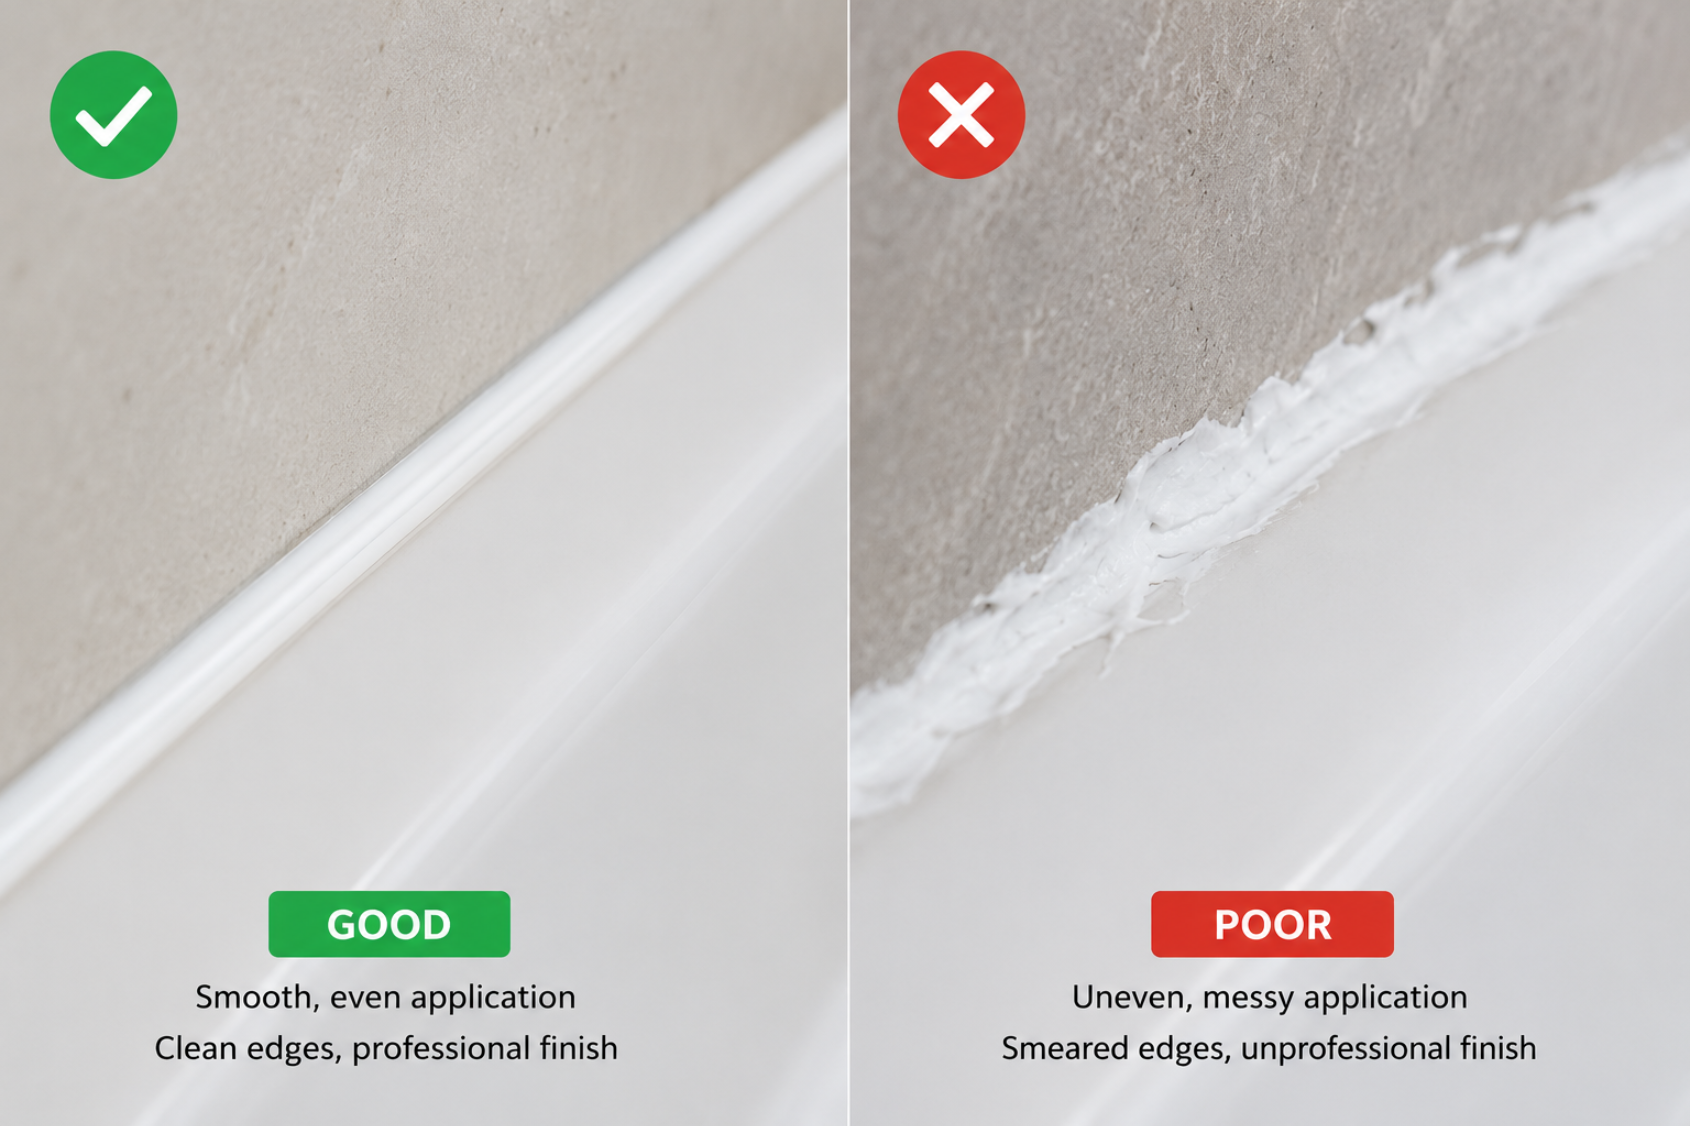
Applying silicone sealant correctly is an essential part of interior finishing, glass installation, joint sealing, waterproofing, and many residential construction projects. A high-quality silicone bead should not only adhere firmly but also appear straight, smooth, uniform, and free from smudges or interruptions.
Many people assume that using a caulking gun and a tube of silicone sealant is enough to achieve professional results. However, improper surface preparation, incorrect nozzle cutting, or inconsistent pressure can lead to uneven sealant lines, excess material buildup, poor adhesion, and premature failure. This is especially important in wet areas such as bathrooms, kitchens, sinks, glass panels, and tiled joints, where proper application helps prevent water leakage, mold growth, and sealant deterioration.
This guide explains how to apply silicone sealant neatly, from preparing tools and surfaces to cutting the nozzle, applying the sealant, and finishing the bead. It also provides recommendations for selecting the right silicone sealant for different applications.
1. What Is Silicone Sealant and Why Is Proper Application Important?
1.1 What Is Silicone Sealant?
Silicone sealant is a flexible sealing material widely used in construction, glazing, interior finishing, aluminum systems, ceramic tiles, sanitary fixtures, and various building materials. After curing, it forms an elastic seal that fills gaps, blocks moisture penetration, and provides long-lasting protection.
Common application areas include glass edges, aluminum window frames, washbasins, toilets, kitchen sinks, wall joints, tile joints, countertops, and other locations requiring gap sealing. Since many of these areas remain visible after installation, neat application is essential for achieving a professional appearance.
Poor application can result in uneven beads, smearing, surface irregularities, edge lifting, visible gaps, or weak adhesion. These issues not only affect aesthetics but may also reduce waterproofing performance and service life.
A professional silicone sealant bead should meet three key requirements:
Straight and uniform appearance
Strong adhesion to the substrate
Smooth and clean surface finish
Achieving these results requires proper surface preparation, selecting the appropriate sealant, maintaining consistent pressure, and tooling the sealant at the correct time.
1.2 Practical Tips for Better Silicone Sealant Application
One of the most common mistakes beginners make is cutting the nozzle opening too large. This causes excessive sealant flow, making it difficult to control and create a neat finish.
In practice, it is better to start with a smaller nozzle opening than the joint width and enlarge it gradually if necessary. Maintaining consistent pressure on the caulking gun is also more important than applying excessive force. A continuous, steady bead generally produces a cleaner result than multiple interrupted sections.
2. Preparing Before Applying Silicone Sealant
Proper preparation significantly affects both the appearance and durability of the finished sealant bead. Even premium-quality sealant may fail if applied over dusty, oily, wet, or poorly prepared surfaces.
2.1 Required Tools
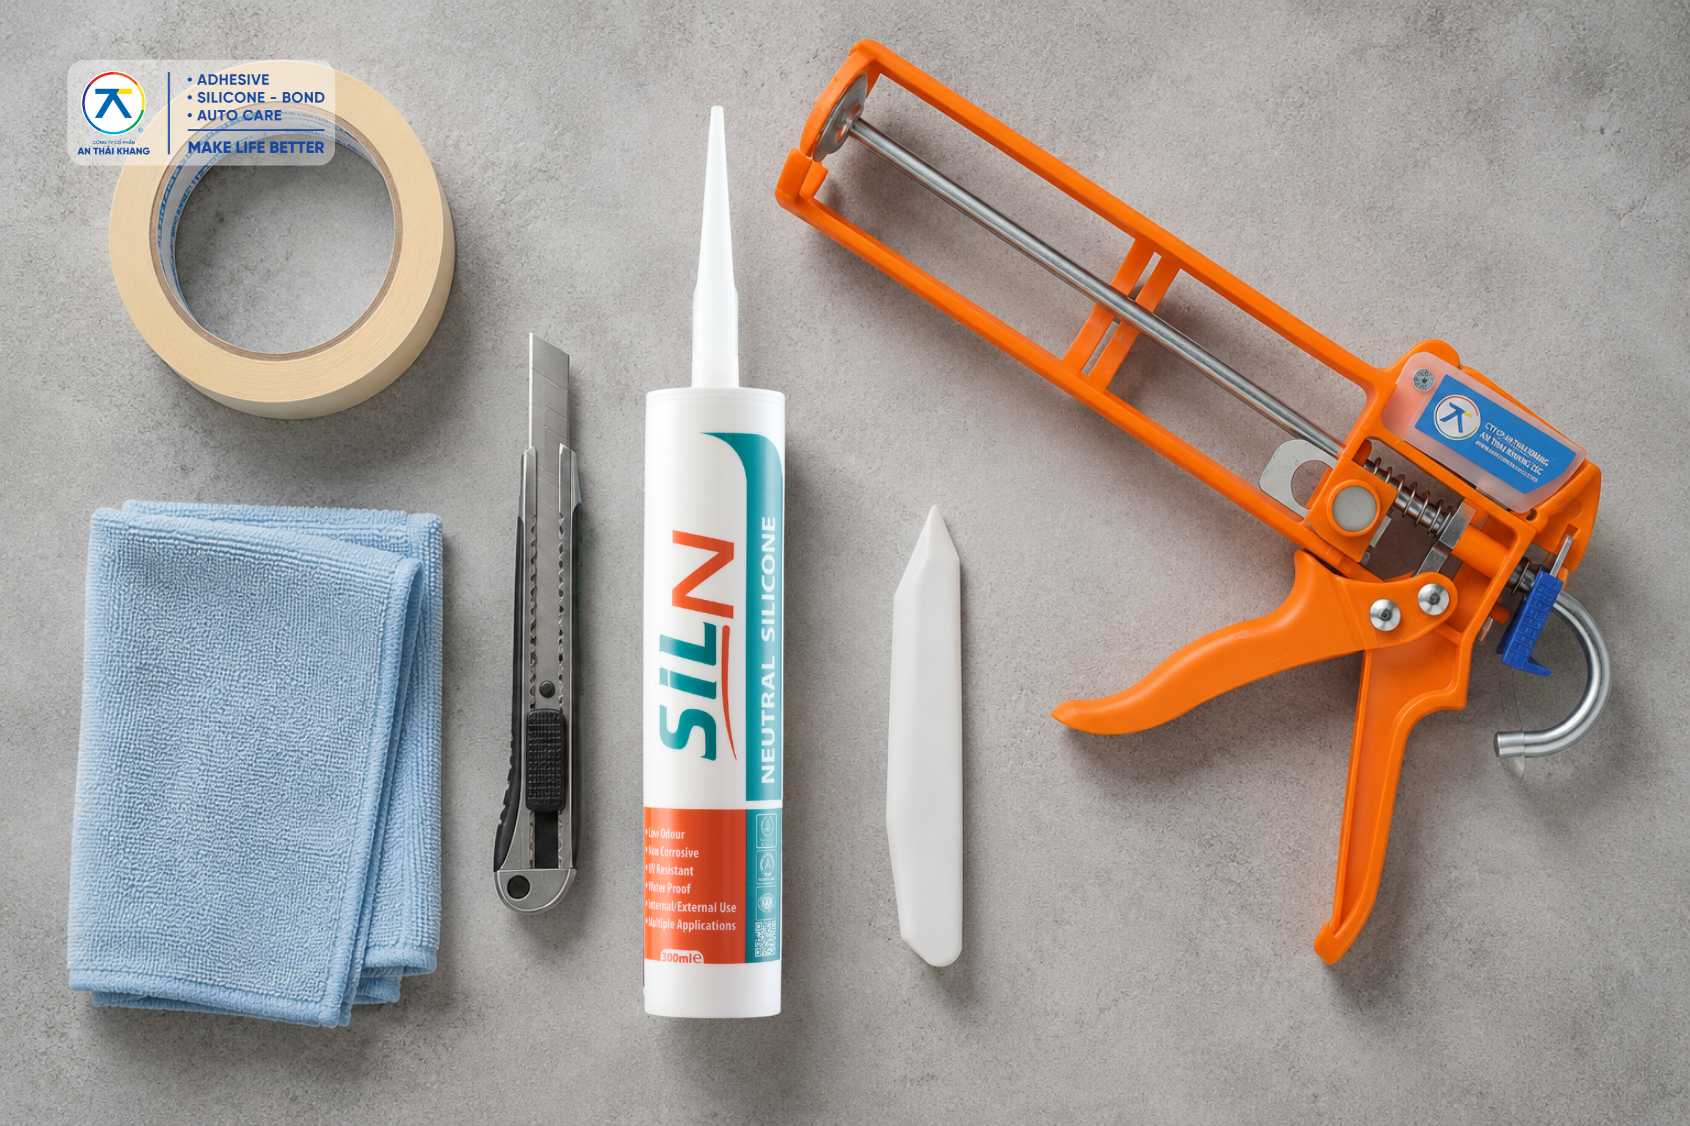
For best results, prepare the following tools:
Silicone sealant cartridge
Caulking gun
Utility knife
Masking tape
Clean cloth
Surface cleaner
Sealant finishing tool
If a professional finishing tool is unavailable, a rounded plastic tool or a gloved finger may be used to smooth the sealant bead.
The caulking gun should operate smoothly without sticking or uneven pressure. A poorly functioning gun often results in inconsistent bead size.
Masking tape is especially helpful for beginners because it creates clean edges and minimizes sealant smearing.
2.2 Clean and Dry the Surface
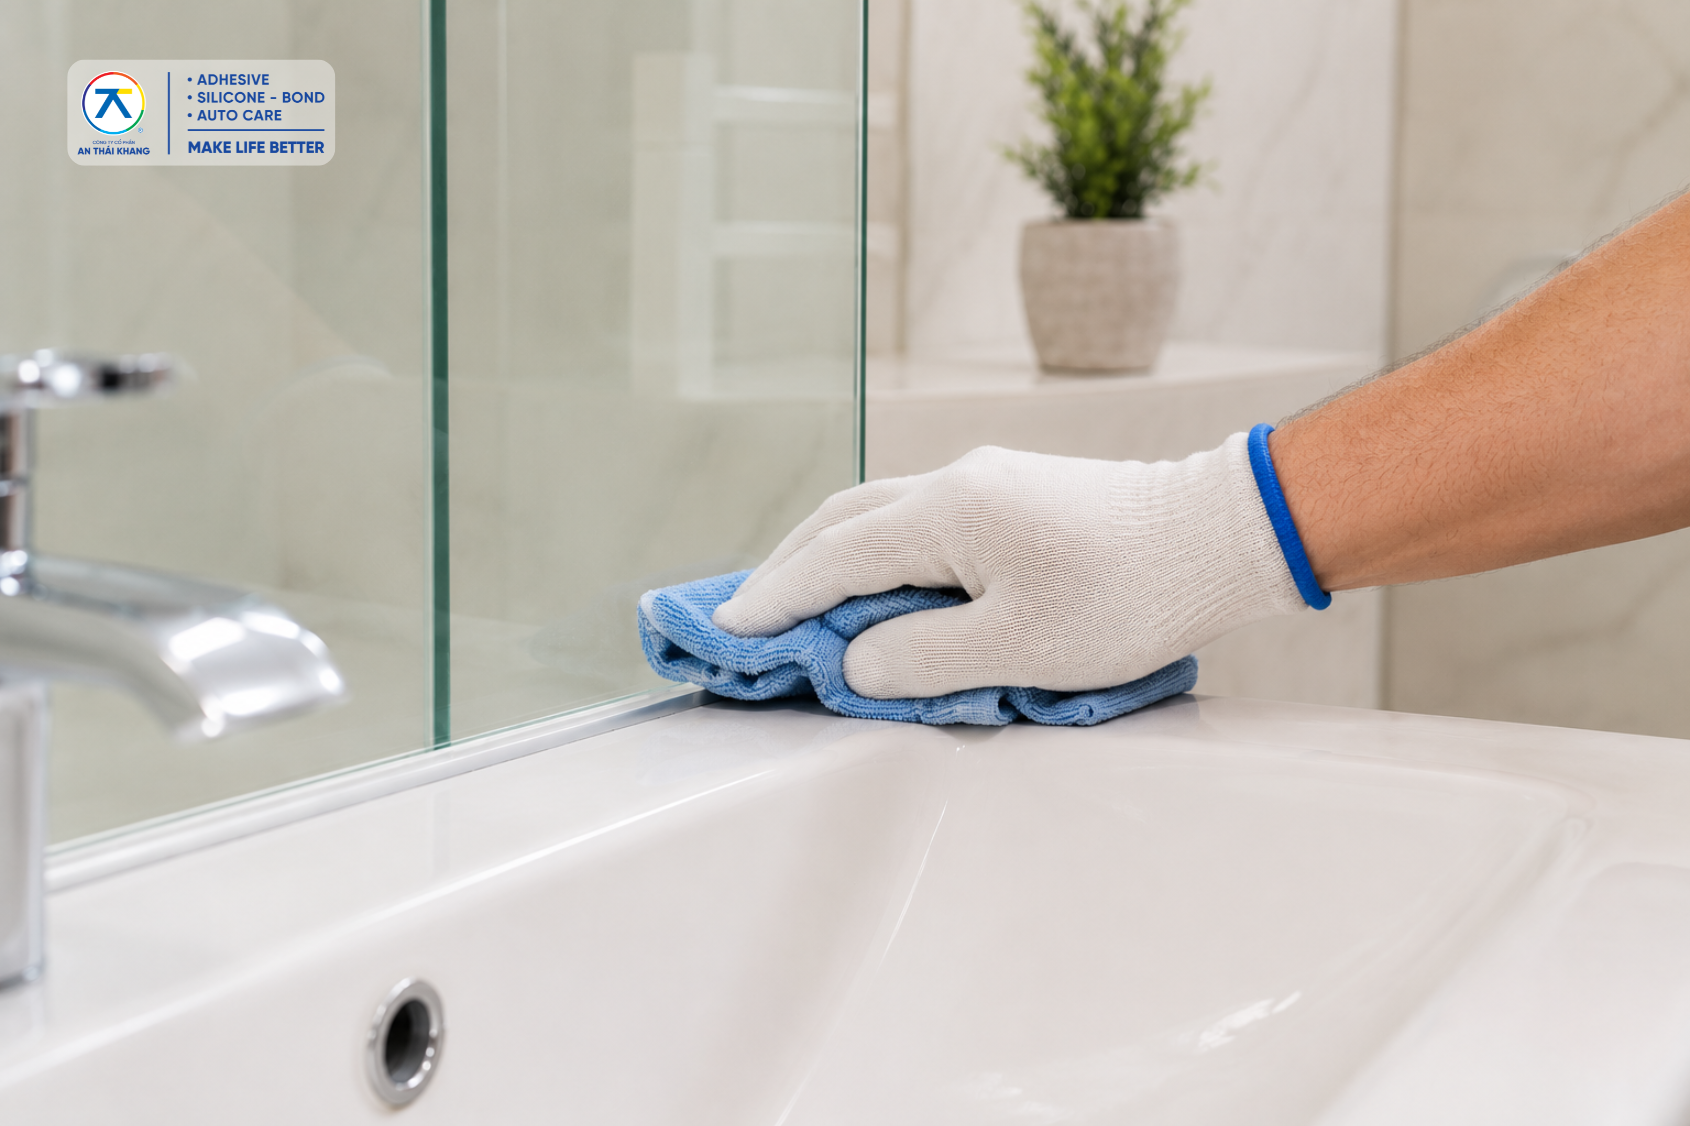
The application surface must be clean, dry, and free from dust, oil, soap residue, moisture, or deteriorated sealant.
In bathrooms, kitchens, and sink areas, surfaces should be thoroughly dried before application because moisture can reduce adhesion.
If old sealant is present, remove it completely using a scraper or utility knife before cleaning the area. Applying new sealant over damaged sealant can lead to premature failure.
Glass, ceramic tiles, stone, and aluminum surfaces should be wiped clean to remove dust. Areas exposed to grease or cooking oils require additional cleaning to ensure proper adhesion.
2.3 Choose the Right Silicone Sealant
Not all silicone sealants are suitable for every substrate. Selection should be based on the application and material requirements.
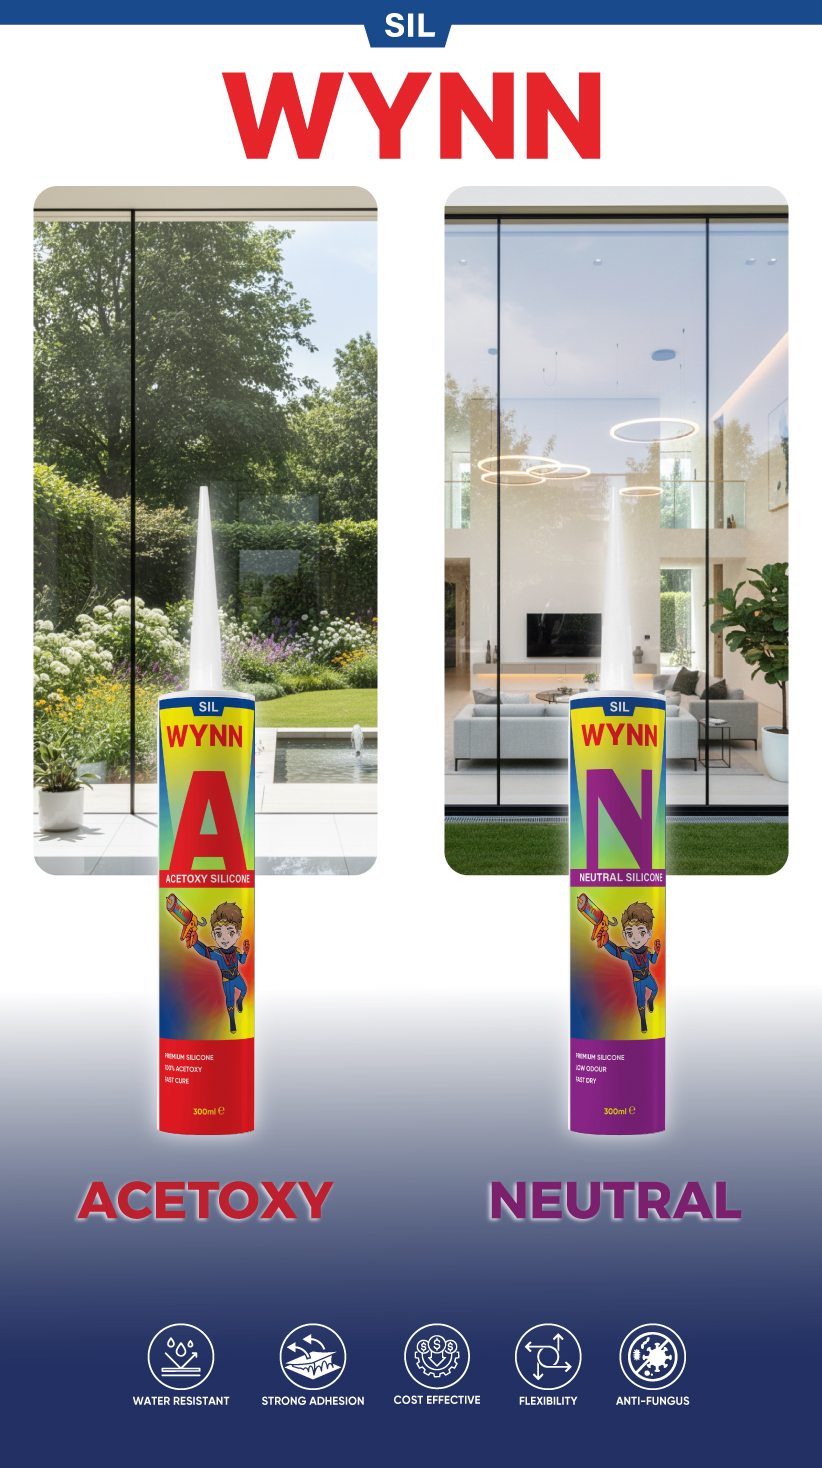
Acetoxy silicone sealants are commonly used on glass and ceramic surfaces.
Neutral cure silicone sealants offer broader compatibility and are often preferred for metals and sensitive substrates.
Specialized silicone sealants may be recommended for projects requiring enhanced durability or specific performance characteristics.
Choosing the correct sealant helps improve application quality, adhesion performance, and long-term durability.
3. Step-by-Step Guide to Applying Silicone Sealant Neatly
A neat silicone sealant bead requires following the correct application sequence. Rushing directly into application without preparation often results in poor finishing quality.
3.1 Cut the Nozzle to the Correct Size
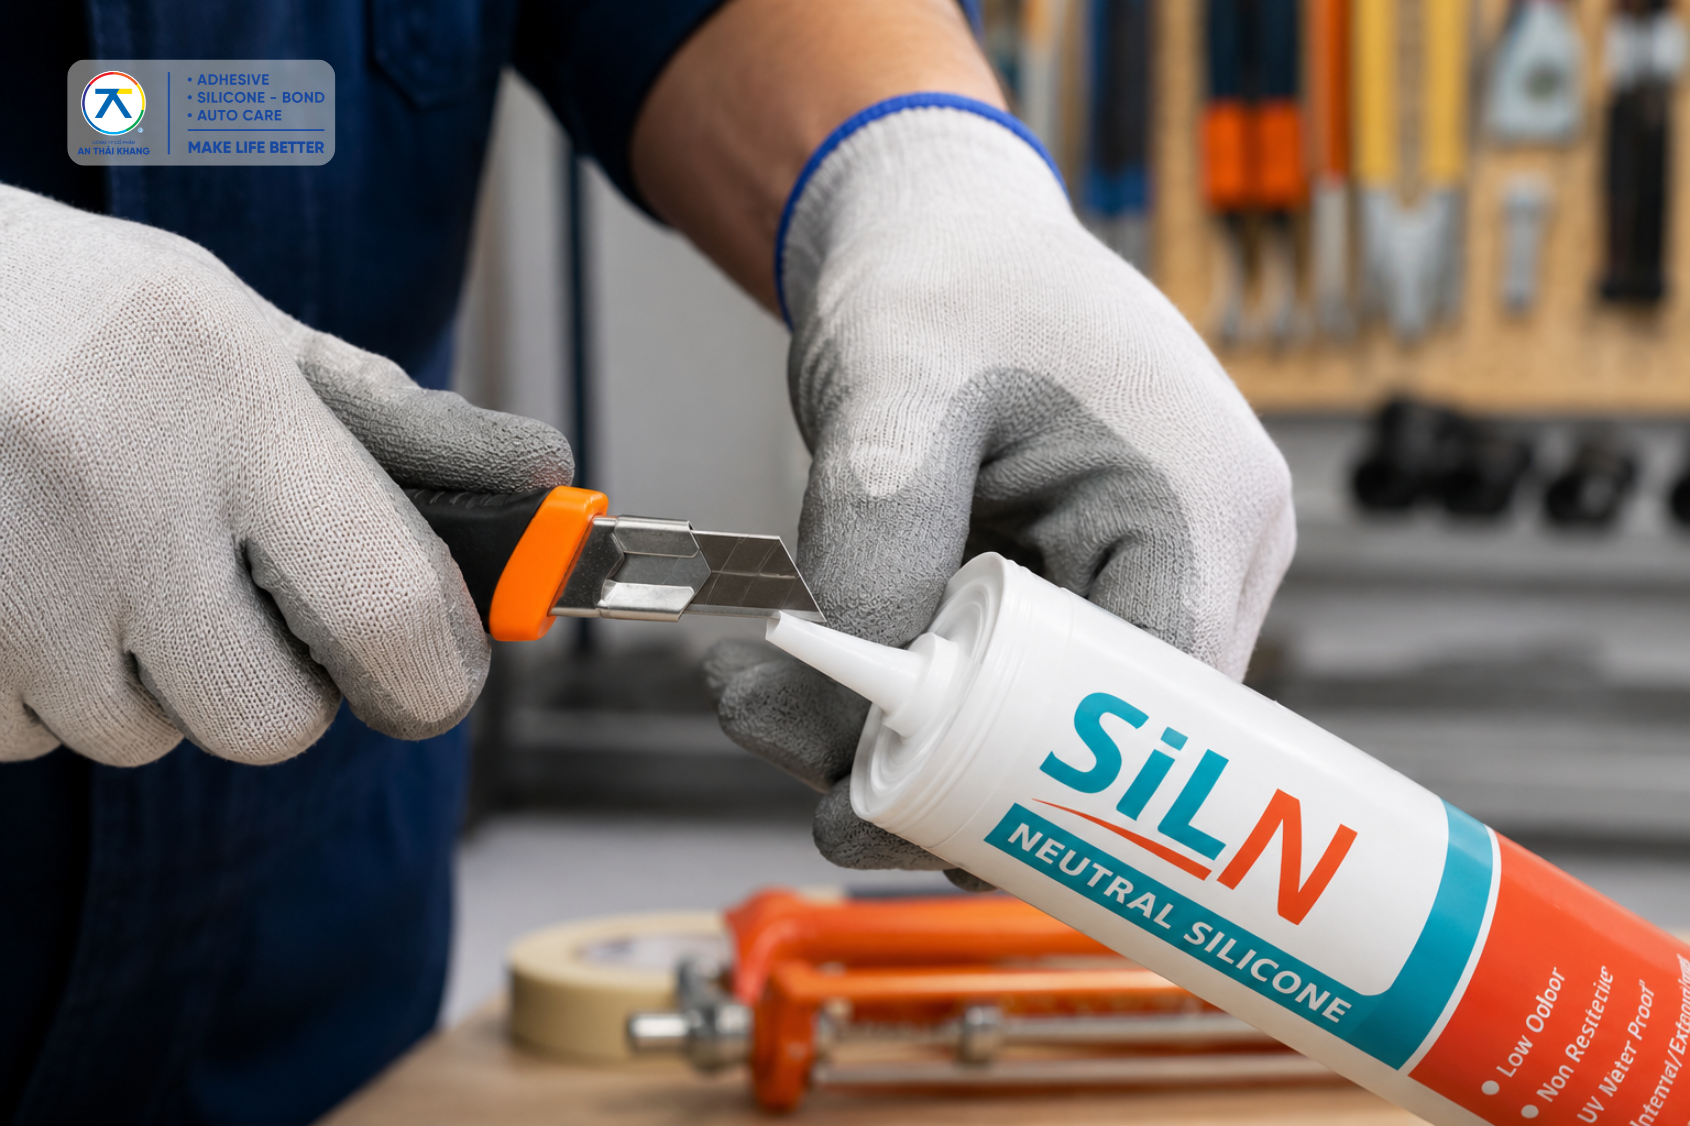
After loading the cartridge into the caulking gun, cut the nozzle at approximately a 45-degree angle.
The opening should match the width of the joint being sealed. An oversized opening may release too much sealant, while an undersized opening may fail to fill the gap properly.
For beginners, it is recommended to start with a smaller opening and enlarge it gradually if additional material is needed.
3.2 Apply Masking Tape
For highly visible areas such as glass edges, sinks, wall joints, and sanitary fixtures, apply masking tape along both sides of the joint.
The distance between the tape lines determines the final bead width.
Ensure the tape is straight and firmly attached to the surface. Remove the tape immediately after tooling the sealant while it is still fresh. Waiting until the sealant cures may damage the bead edge.
3.3 Hold the Caulking Gun at the Proper Angle
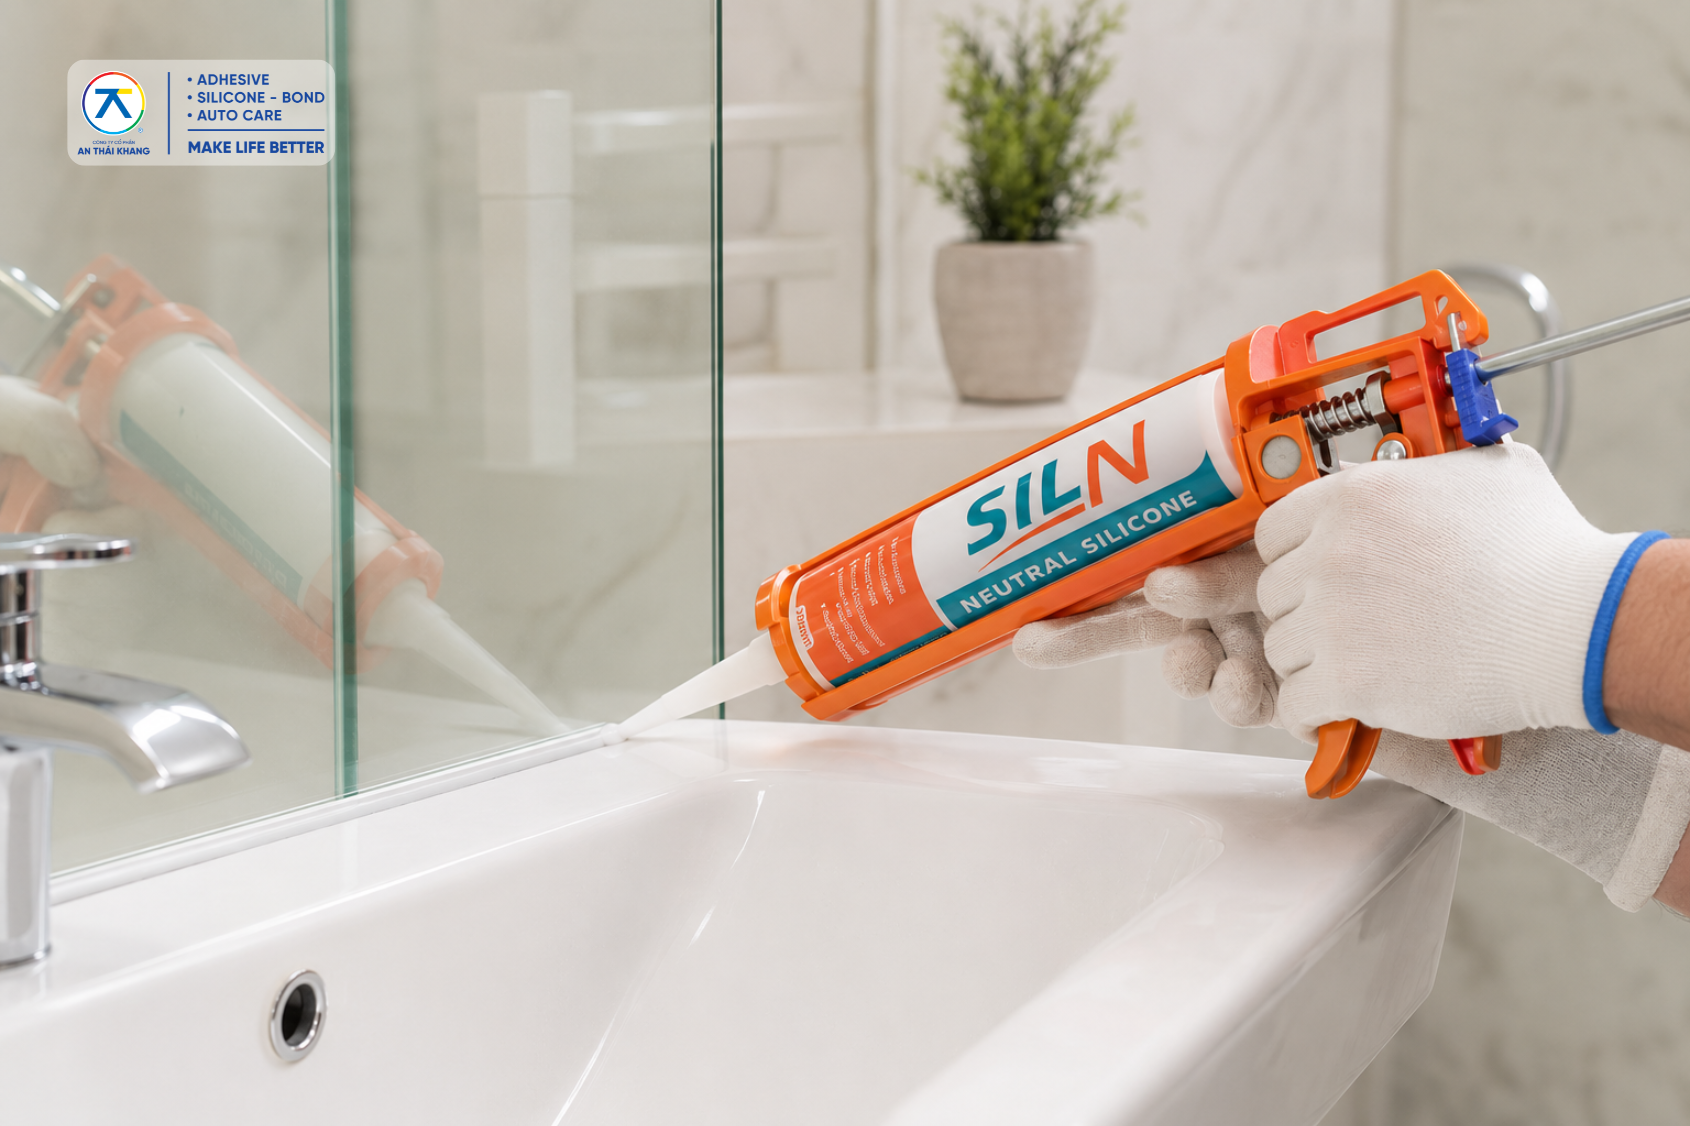
Hold the gun at a consistent angle in the direction of movement. The nozzle should lightly contact or remain close to the joint surface.
Maintain steady pressure while moving the gun at a consistent speed. Avoid squeezing too hard in one area and too lightly in another, as this creates uneven bead sizes.
If you need to stop, release pressure gently and continue from the nearest point without creating excessive buildup.
3.4 Apply a Continuous Bead
One of the most important techniques for achieving a professional finish is applying the sealant in one continuous motion.
Frequent stops can create overlaps, visible joints, and uneven sections.
Before beginning long runs, position yourself comfortably to maintain a consistent movement. For difficult or confined areas, practice the movement beforehand without dispensing sealant.
4. How to Tool Silicone Sealant for a Smooth Finish
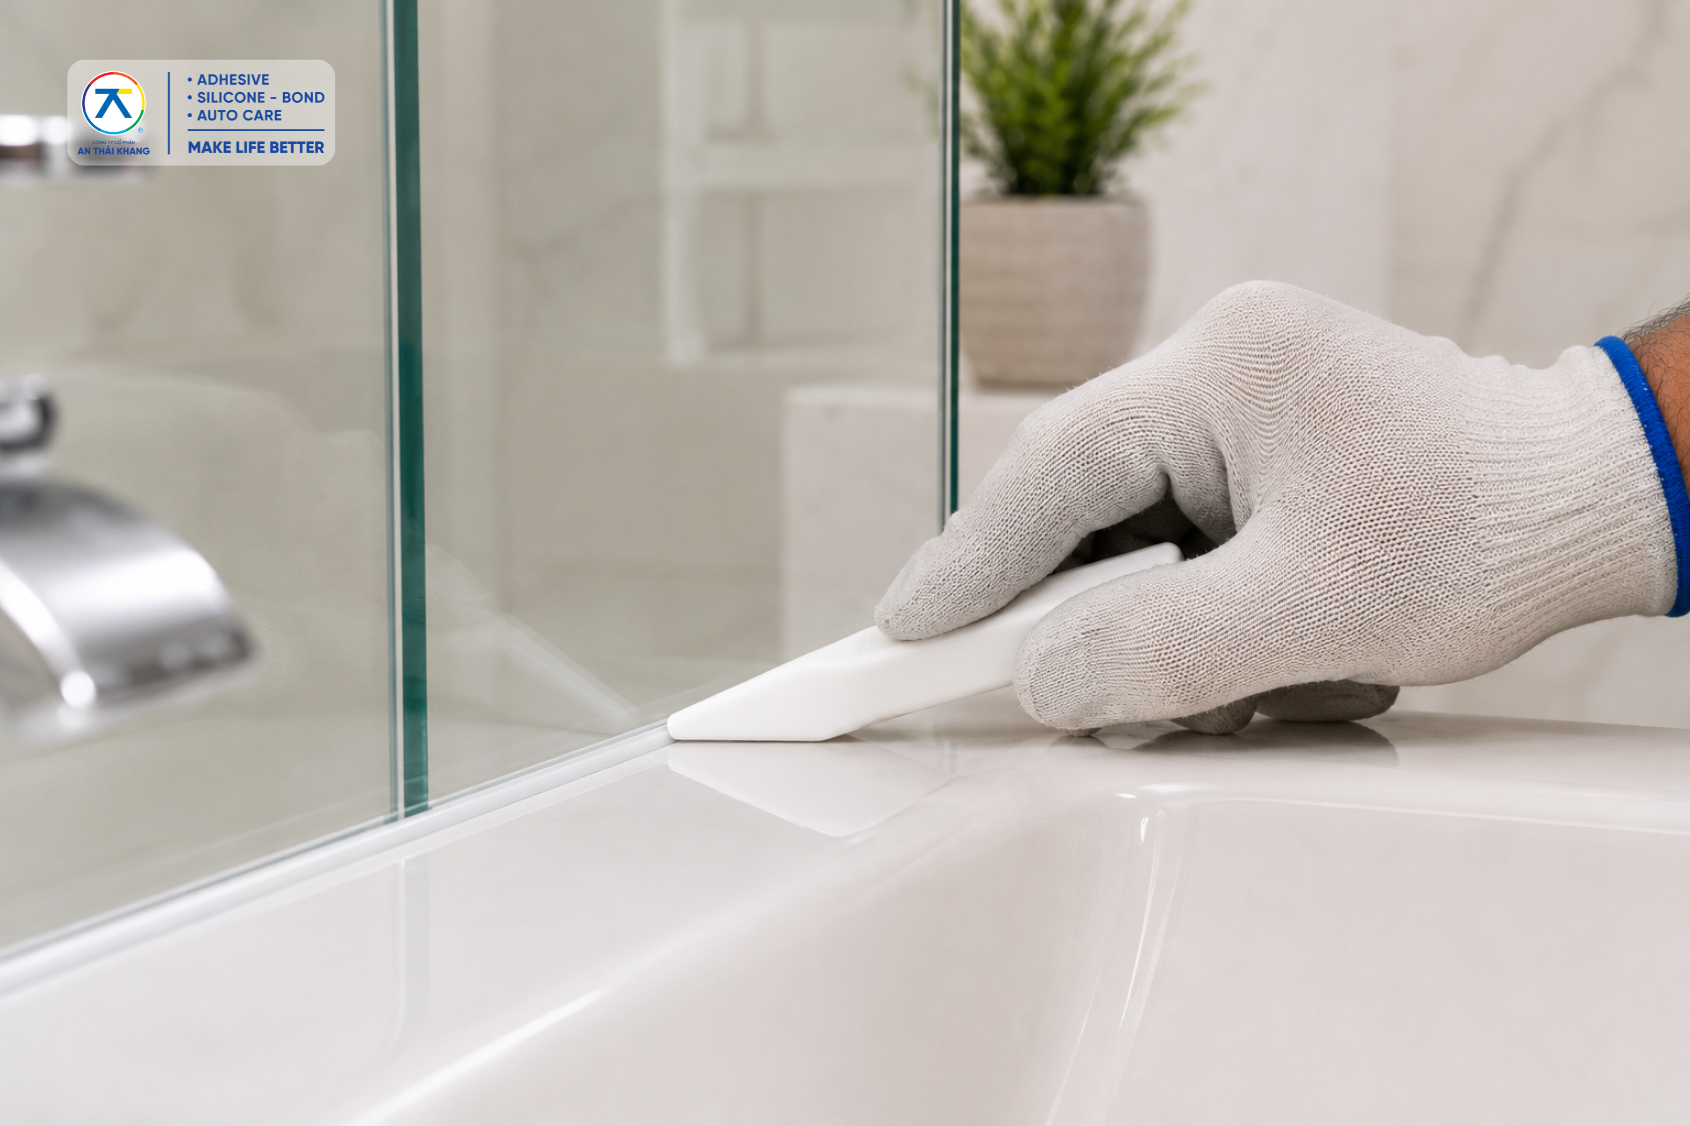
Tooling is the process of shaping the sealant bead after application. This step improves appearance and ensures proper contact with both sides of the joint.
4.1 Tool the Sealant While It Is Still Fresh
Tool the sealant immediately after application before surface skinning begins.
If delayed too long, the sealant may become difficult to smooth and can develop wrinkles or stringing.
Apply moderate pressure to create good contact with the joint surfaces while maintaining a smooth finish.
4.2 Use Appropriate Finishing Tools
Professional sealant finishing tools produce consistent, attractive bead profiles.
Alternatively, a rounded plastic tool or a gloved finger may be used. Always clean excess sealant from the tool between passes.
Avoid sharp objects that may damage the sealant surface or surrounding materials.
4.3 Remove Masking Tape at the Right Time
If masking tape is used, remove it immediately after tooling while the sealant remains uncured.
Pull the tape away at an angle using a slow, controlled motion to prevent disturbing the finished bead.
Minor adjustments can be made immediately after tape removal, but excessive reworking should be avoided.
5. Common Silicone Sealant Application Mistakes
Common mistakes include:
Applying sealant on wet or dirty surfaces
Failing to remove old sealant completely
Cutting the nozzle opening too large
Applying inconsistent pressure
Delaying the tooling process
Selecting the wrong sealant type for the substrate
Avoiding these mistakes significantly improves both appearance and long-term performance.
6. Tips for Long-Lasting Sealant Performance
Allow sufficient curing time before exposing the sealant to water or mechanical stress.
In bathrooms, kitchens, and sink areas, avoid cleaning or touching the sealant immediately after application.
Routine cleaning with a soft cloth helps maintain appearance. Avoid scraping cured sealant with sharp tools, as this may damage the seal and create pathways for moisture intrusion.
Maintaining adequate ventilation in humid environments can also help reduce mold growth.
7. Which Silicone Sealant Should You Choose?
In addition to application technique, selecting the right silicone sealant directly affects the appearance and durability of the finished joint.
Acetoxy silicone sealants are commonly used for glass and ceramic surfaces.
Neutral cure silicone sealants provide excellent compatibility with aluminum and various metals.
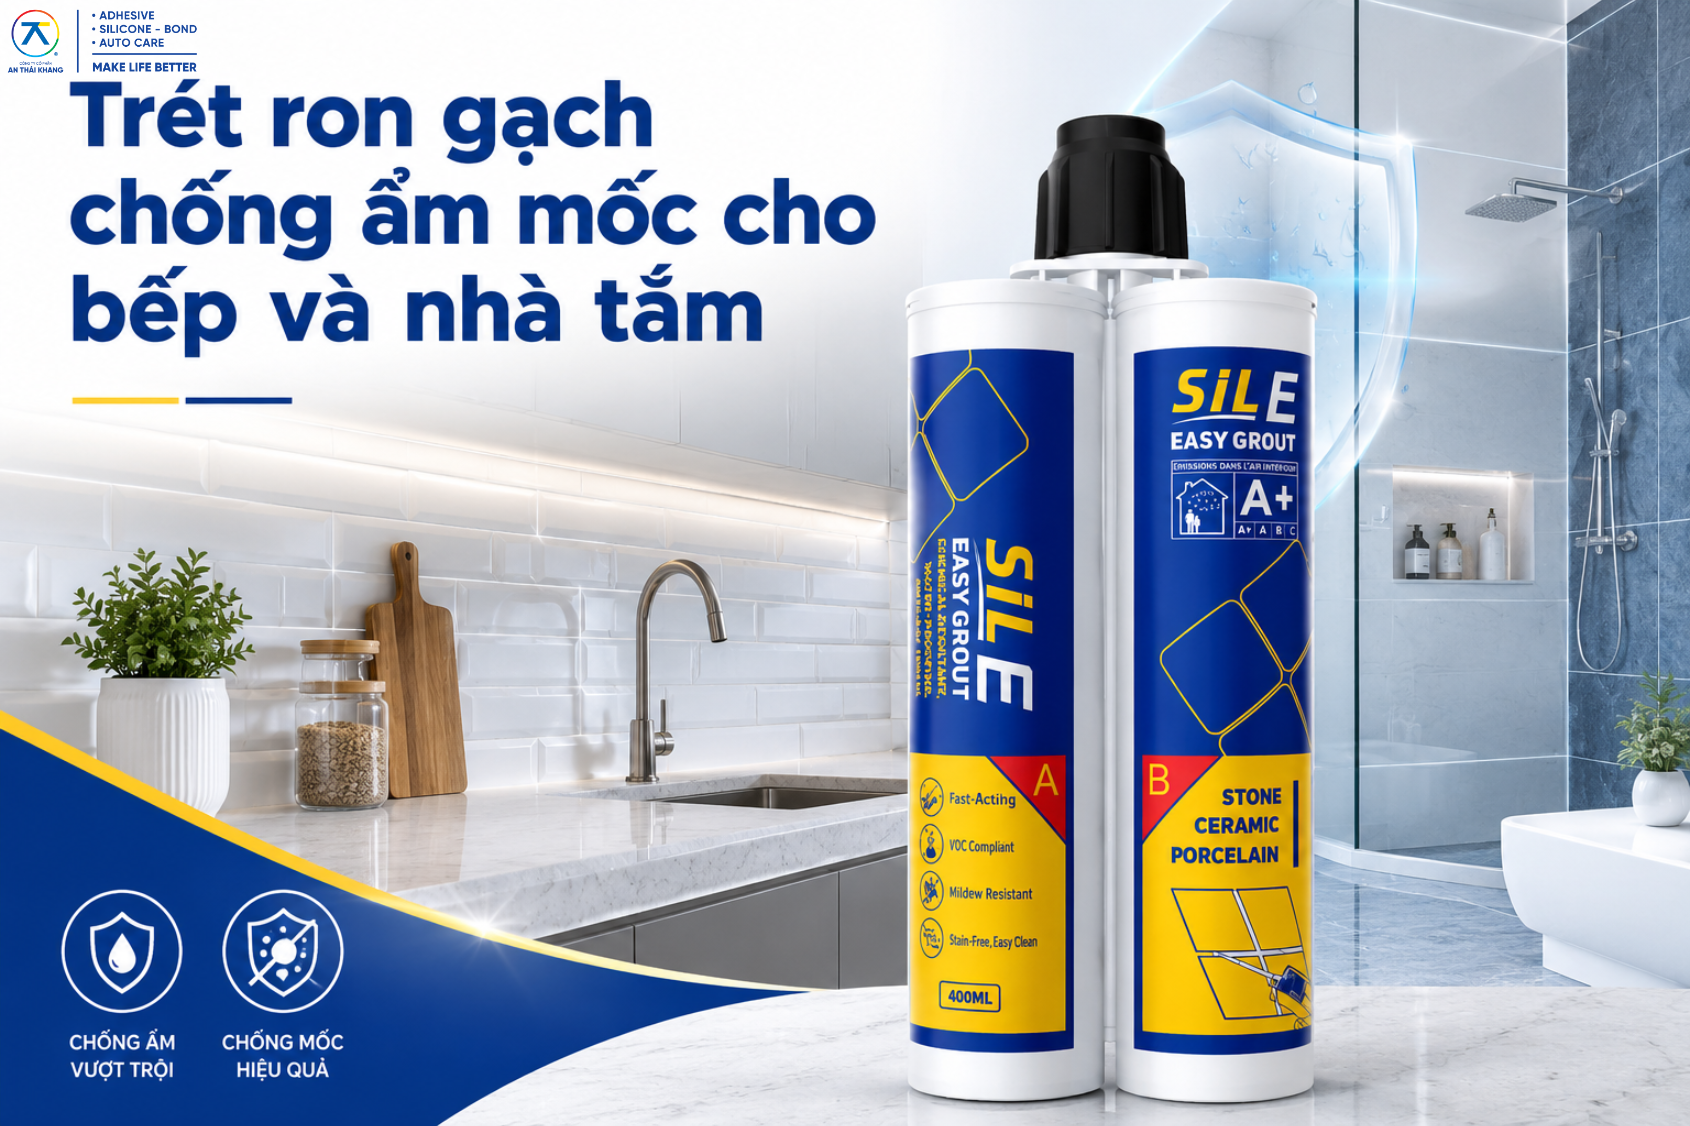
Mold-resistant silicone sealants are recommended for bathrooms, sinks, and high-humidity environments.
Glazing silicone sealants are widely used in aluminum and glass installations where aesthetics are important.
Selecting the right product from the beginning makes application easier and improves long-term performance.
8. Frequently Asked Questions
How long does silicone sealant take to dry?
Surface skin formation may occur within minutes to several hours depending on the product. Always follow the manufacturer's curing recommendations before exposing the sealant to water.
Is masking tape necessary?
Yes. Masking tape helps create cleaner edges and is particularly useful for beginners.
What should I do if the sealant smears?
Remove excess sealant while it is still fresh. Once cured, specialized sealant removal tools may be required.
Can silicone sealant be applied on wet surfaces?
No. The surface should be clean and dry to ensure proper adhesion and long-term durability.
How can I achieve a more consistent bead?
Hold the caulking gun at a steady angle, apply consistent pressure, and move continuously in one direction.
9. Conclusion
Learning how to apply silicone sealant neatly involves proper preparation, correct sealant selection, precise nozzle cutting, controlled application, and timely tooling. A professional sealant bead should be straight, smooth, clean, and firmly bonded to both surfaces.
By following the techniques outlined in this guide and avoiding common mistakes, you can achieve attractive, durable sealant joints that enhance both appearance and waterproofing performance.
If you are looking for silicone sealants for glass, aluminum systems, bathrooms, sinks, kitchens, or general construction sealing applications, explore An Thai Khang's silicone sealant solutions to find the most suitable product for your project.
AN THAI KHANG JSC
- • Fanpage: An Thái Khang JSC
- • Hotline: 0764 644 245
- • Email: support@anthaikhang.com
- • Website: https://anthaikhang.com/