
7 Ways to Help Silicone Cure Faster During Application
Discover 7 ways to help silicone cure faster and more consistently during application, from choosing the right sealant and preparing the surface to controlling bead size, temperature, humidity, and waiting time.
After applying silicone, everyone wants the sealant bead to stabilize quickly so the next stage of work can continue. However, making silicone cure faster does not mean applying intense heat or trying to force the curing process.
One-component silicone sealants generally react with moisture in the air, forming a surface skin first before gradually curing inward. Therefore, the more effective way to reduce waiting time is to prepare the surface properly, control the amount of sealant applied, and maintain suitable application conditions. GP Silicone – Acid Cure, for example, forms a skin in approximately 5–15 minutes, while its curing time may increase under low-temperature or low-humidity conditions.
1. Surface Dry Does Not Mean Fully Cured
This is the first point to understand before looking for ways to make silicone cure faster.
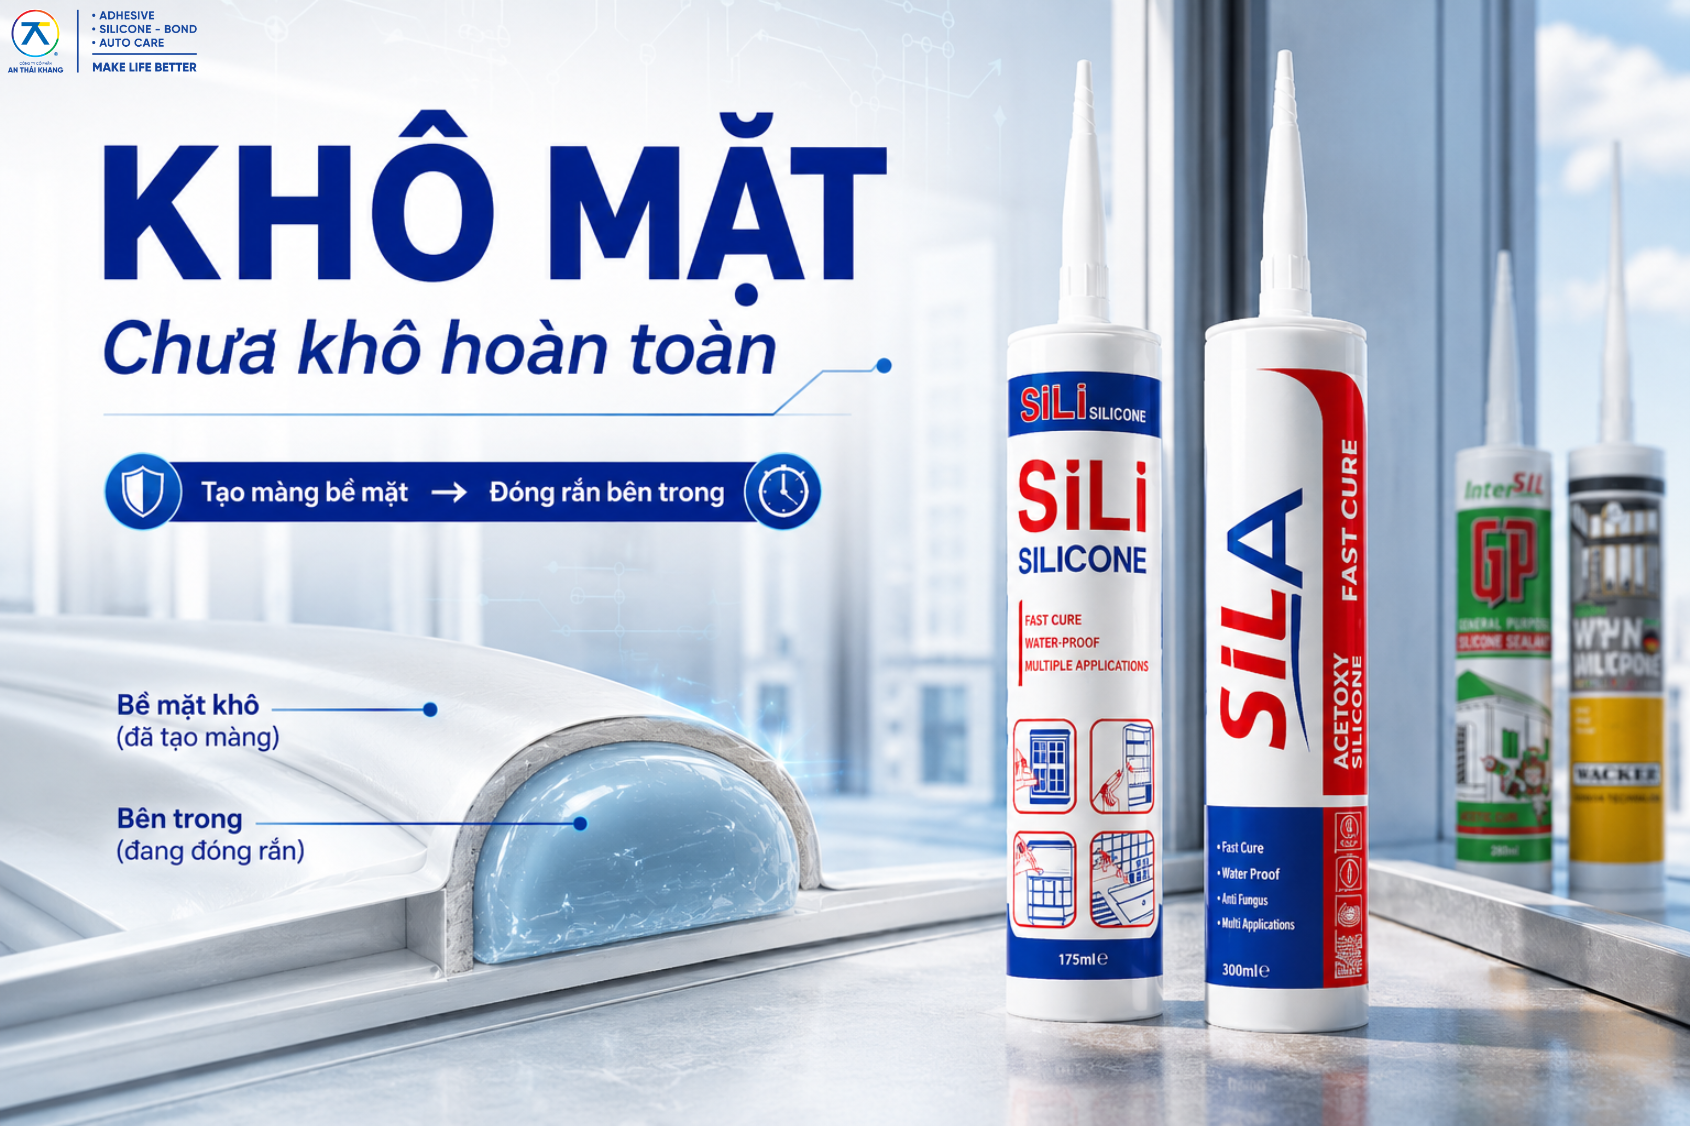
After application, silicone generally goes through two stages:
Surface skin formation → Gradual curing toward the inside
A dry or skinned-over surface only means that the outer layer has begun to stabilize. The silicone deeper inside the bead still requires additional time to complete the curing process.
For example, SIL A Silicone – Acid Cure becomes surface-dry in approximately 5 minutes but may require up to around 24 hours to cure completely. SILI Silicone – Acid Cure has a surface-drying time of approximately 25 minutes and reaches full cure after around 24 hours.
Therefore, the goal should not be to make the surface skin over as quickly as possible, but to create suitable conditions for the entire silicone bead to cure consistently and within the expected timeframe.
2. 7 Ways to Help Silicone Cure Faster and More Consistently
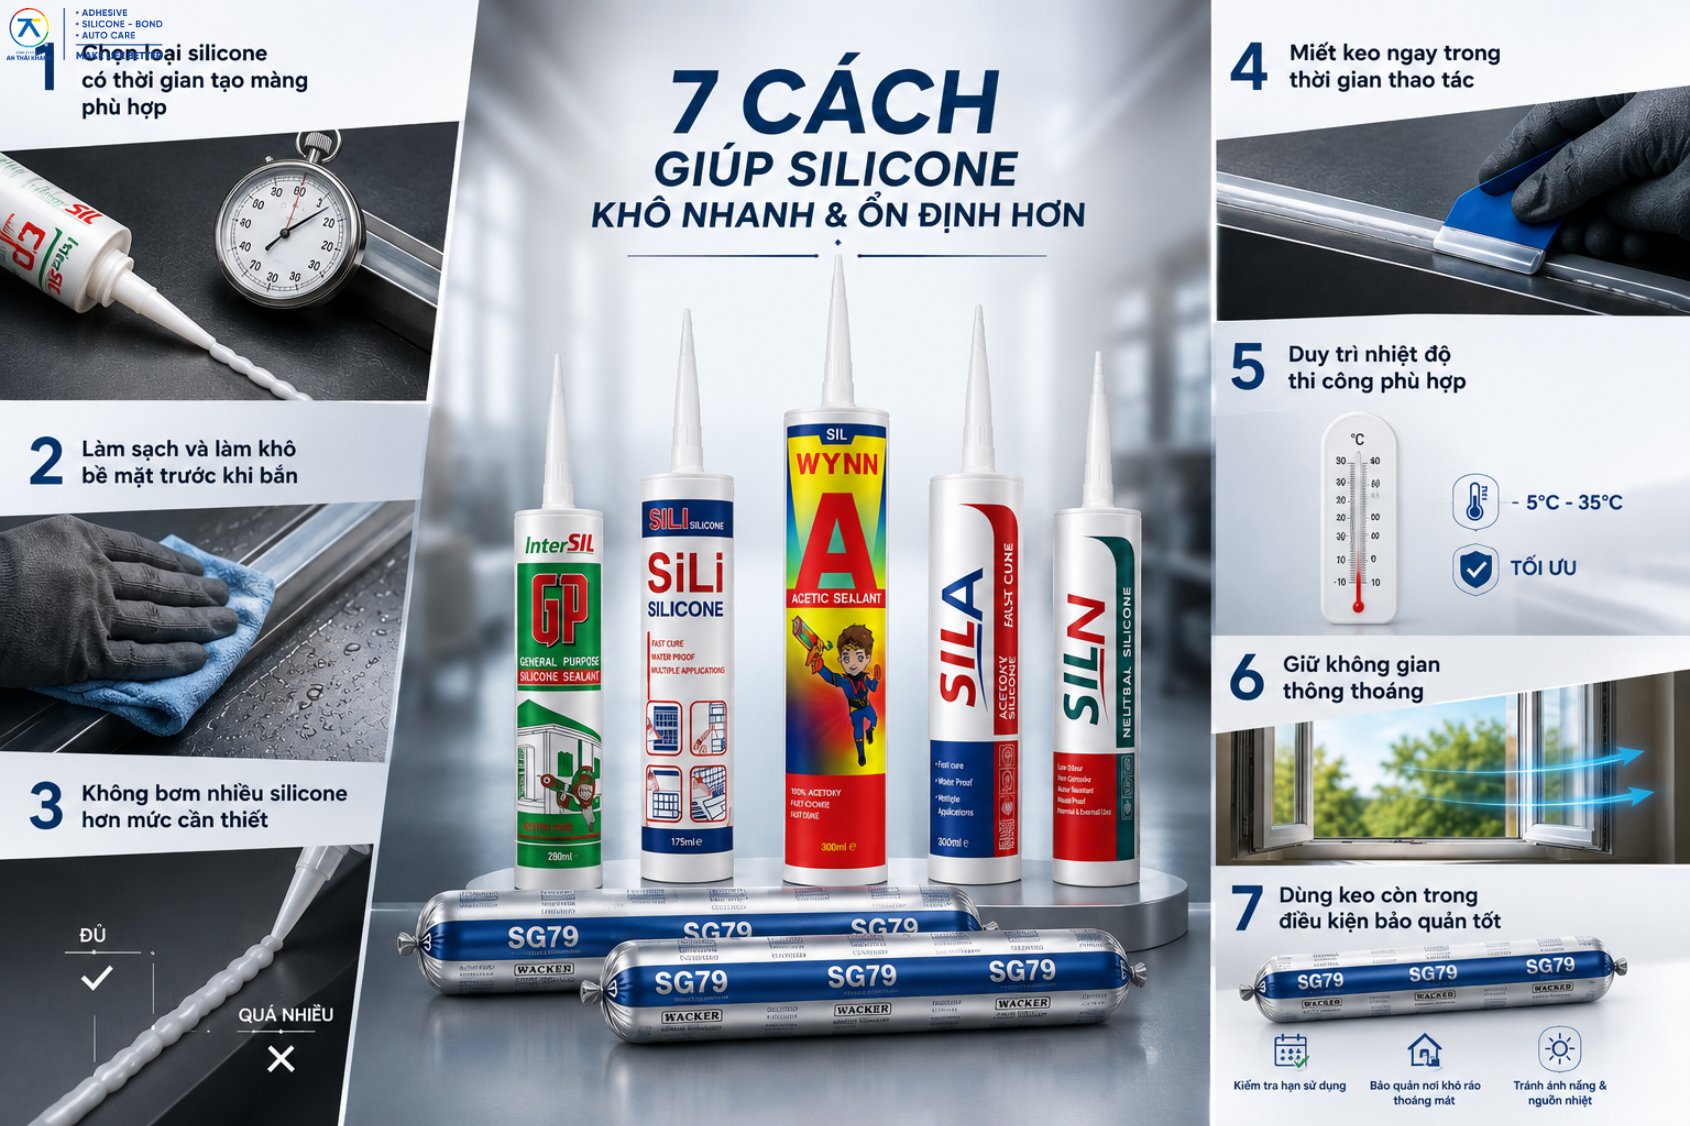
2.1. Choose a Silicone with a Suitable Skin-Formation Time
If the job requires quick handling, check the skin-formation time when selecting the product.
Some acid-cure silicones form a skin and become surface-dry relatively quickly, making them suitable for applications that require fast handling and finishing. However, curing speed also depends on environmental conditions, bead dimensions, and the application surface. Therefore, the product should be selected according to the actual application rather than based only on drying time.
Speed should not be the only consideration. The substrate and application area remain key factors. A silicone that skins quickly but is not compatible with the surface will not make the job more efficient.
2.2. Clean and Dry the Surface Before Application
Dust, grease, old sealant, and other contaminants can prevent the silicone from making direct contact with the substrate.
Before application, remove dust, grease, old silicone, and other contaminants from the area to be sealed. Then allow the surface to dry completely before applying the new silicone. A clean, dry surface helps the sealant make better contact with the material and supports more consistent curing.
It is important to distinguish between two conditions:
The surface must be dry – the surrounding air still needs moisture for silicone to cure.
These two requirements do not conflict with each other.
2.3. Do Not Apply More Silicone Than Necessary
A larger silicone bead does not automatically create a better joint.
Silicone cures from the outside inward, so the thicker the bead, the more time the inner section requires to stabilize completely. When cutting the nozzle, adjust the opening according to the actual joint size and apply only enough silicone to fill the gap properly.
After application, remove excess sealant while it is still fresh. Cut the nozzle according to the joint dimensions and clean away unwanted silicone before it cures.
However, the bead should not be made excessively thin simply to speed up curing. The joint dimensions must still be appropriate for the actual application.
2.4. Tool the Silicone Within the Working Time
Do not wait until the silicone begins to form a skin before shaping the joint.
Immediately after application, use a spatula, tooling tool, or another suitable method to smooth the surface while the silicone is still workable. SILI Silicone allows tooling within approximately 3–5 minutes, while WACKER WN also recommends smoothing the surface immediately after extrusion.
Finishing the bead properly from the beginning helps avoid repeated contact once the silicone has already started to skin over.
A simple sequence to remember is:
Apply evenly → Tool immediately → Remove excess sealant → Leave it undisturbed to cure
2.5. Maintain a Suitable Application Temperature
Ambient temperature directly affects the curing rate of silicone. When applied under excessively cold conditions, the curing process may slow down.
For this reason, choose a period with stable temperatures and avoid applying silicone to surfaces that are excessively hot or cold. Suitable and consistent temperatures help the bead cure more evenly and predictably.
A stable environment within the product’s recommended temperature range is much easier to control.
2.6. Keep the Area Well Ventilated
Silicone requires natural moisture in the air to cure. Therefore, the application area should be reasonably well ventilated with moderate air circulation. If the environment is excessively dry or enclosed, curing may take longer.
In an enclosed room, opening doors or windows can improve air circulation. If a fan is used, create a gentle airflow rather than directing hot air straight at the silicone bead.
After application, silicone generally forms a surface skin first and then gradually cures inward. The required time varies depending on the type of silicone, bead thickness, and environmental conditions.
For this reason, do not assume that a joint is ready for use simply because the surface has already skinned over.
2.7. Use Silicone That Has Been Properly Stored
A tube of silicone that has remained open for a long time, been stored in a hot location, or been exposed to air for an extended period may no longer be in optimal condition for application.
Silicone should be stored in a dry, cool, and well-ventilated location away from direct sunlight and heat sources. Stable storage conditions help maintain the sealant in good condition before use and reduce the risk of application problems.
Before applying the product, check the packaging, expiration date, and the condition of the silicone as it is extruded. The sealant should flow evenly without lumps or other unusual signs.
3. For Faster Application, Start by Choosing the Right Silicone
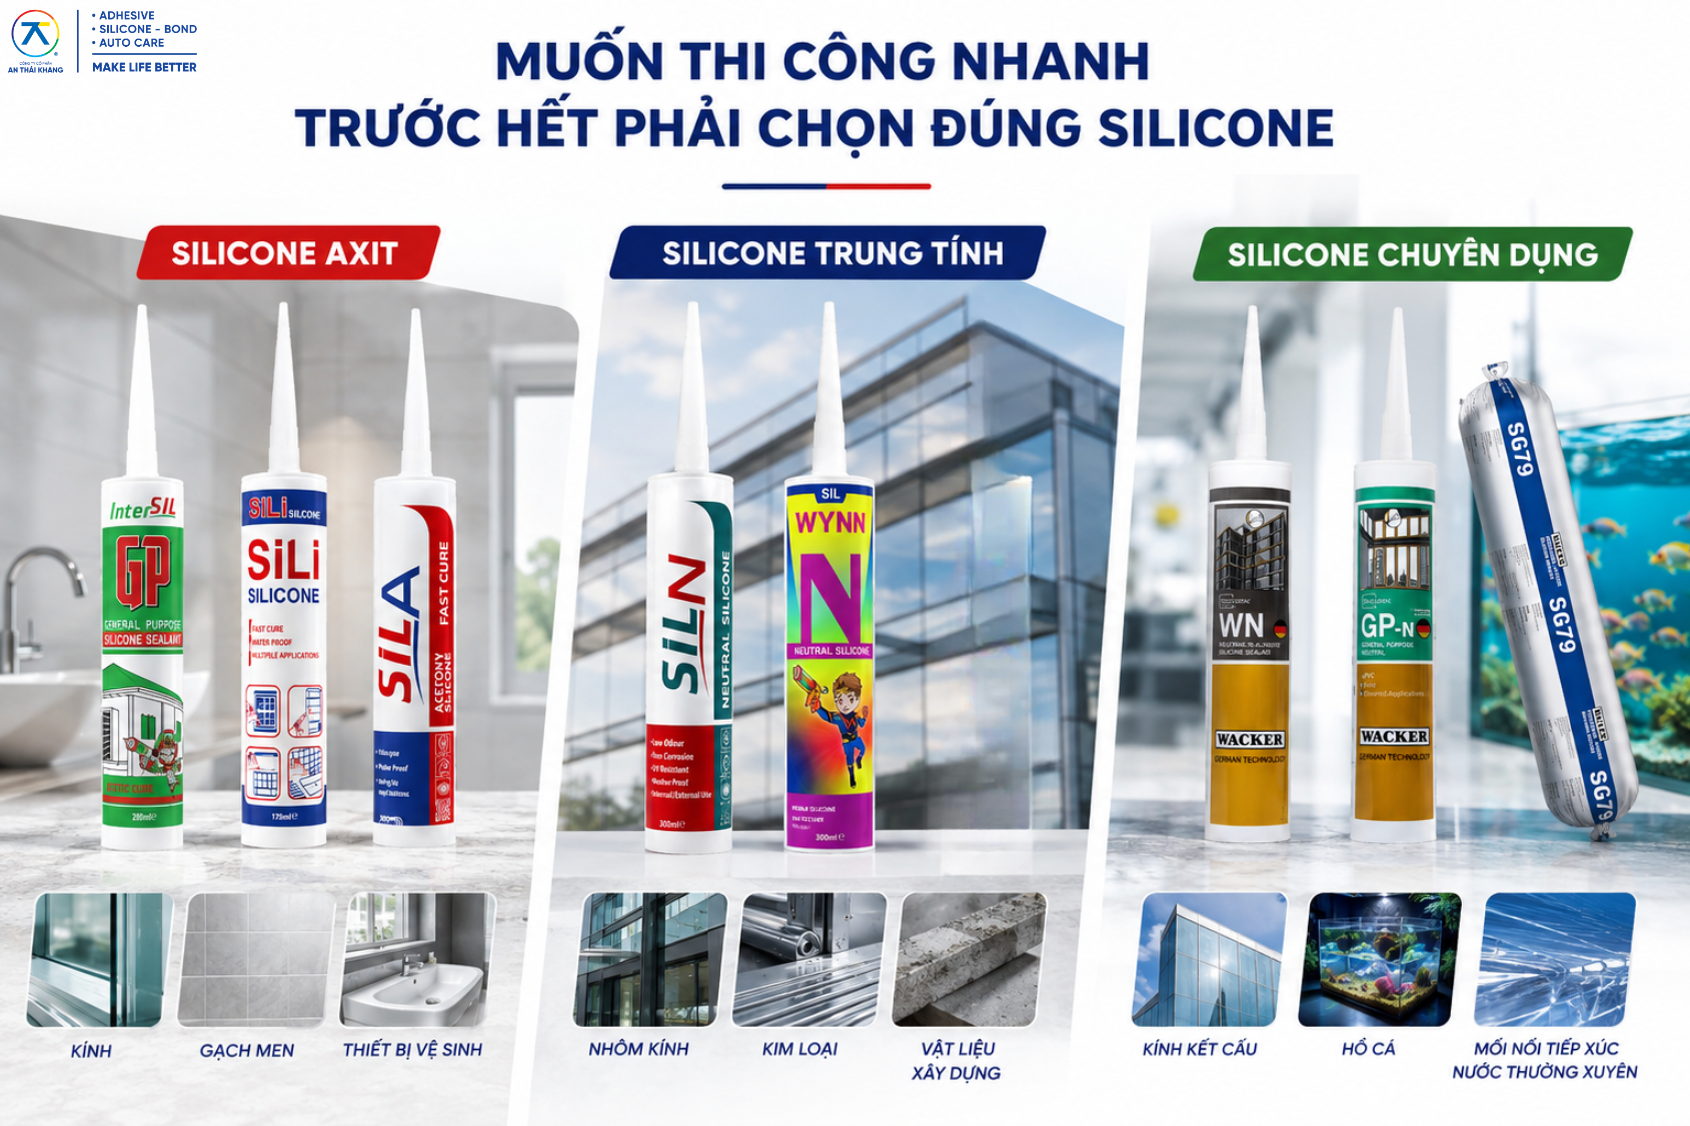
Curing speed is only one part of the process. Choosing the correct silicone system for the substrate can help prevent the need to remove the sealant and redo the application.
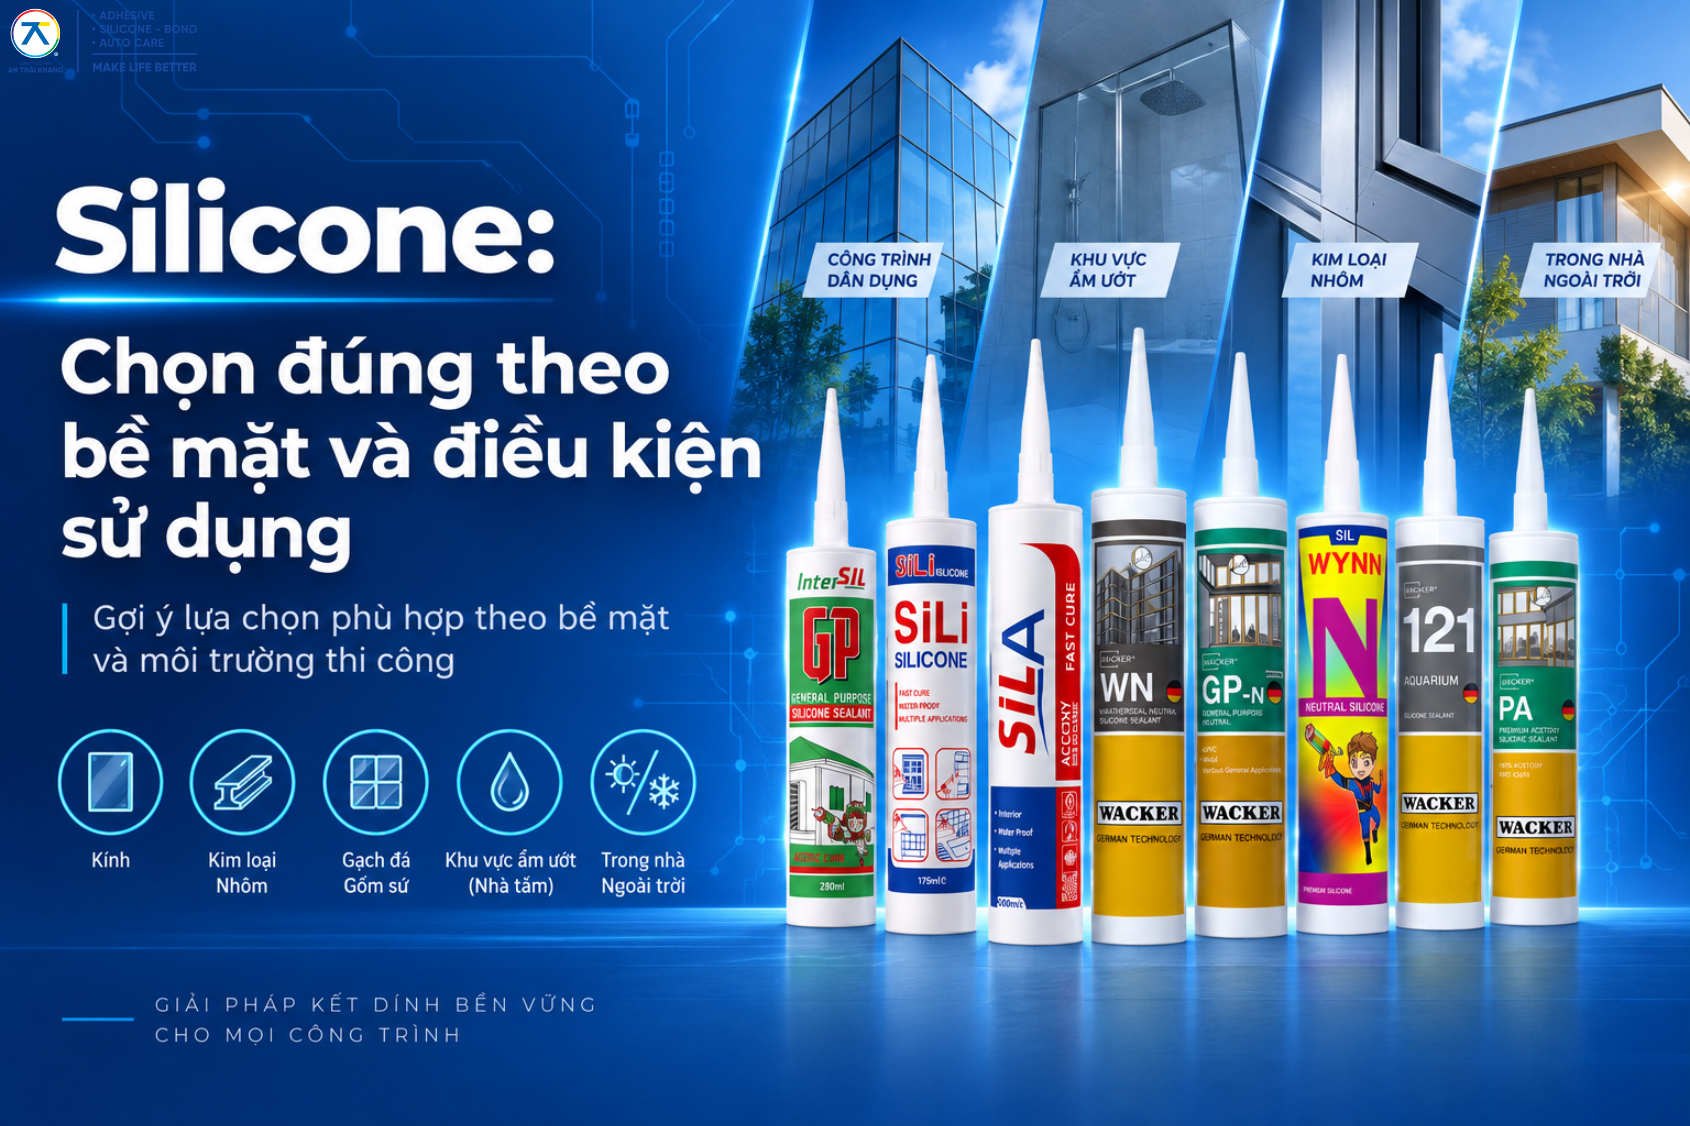
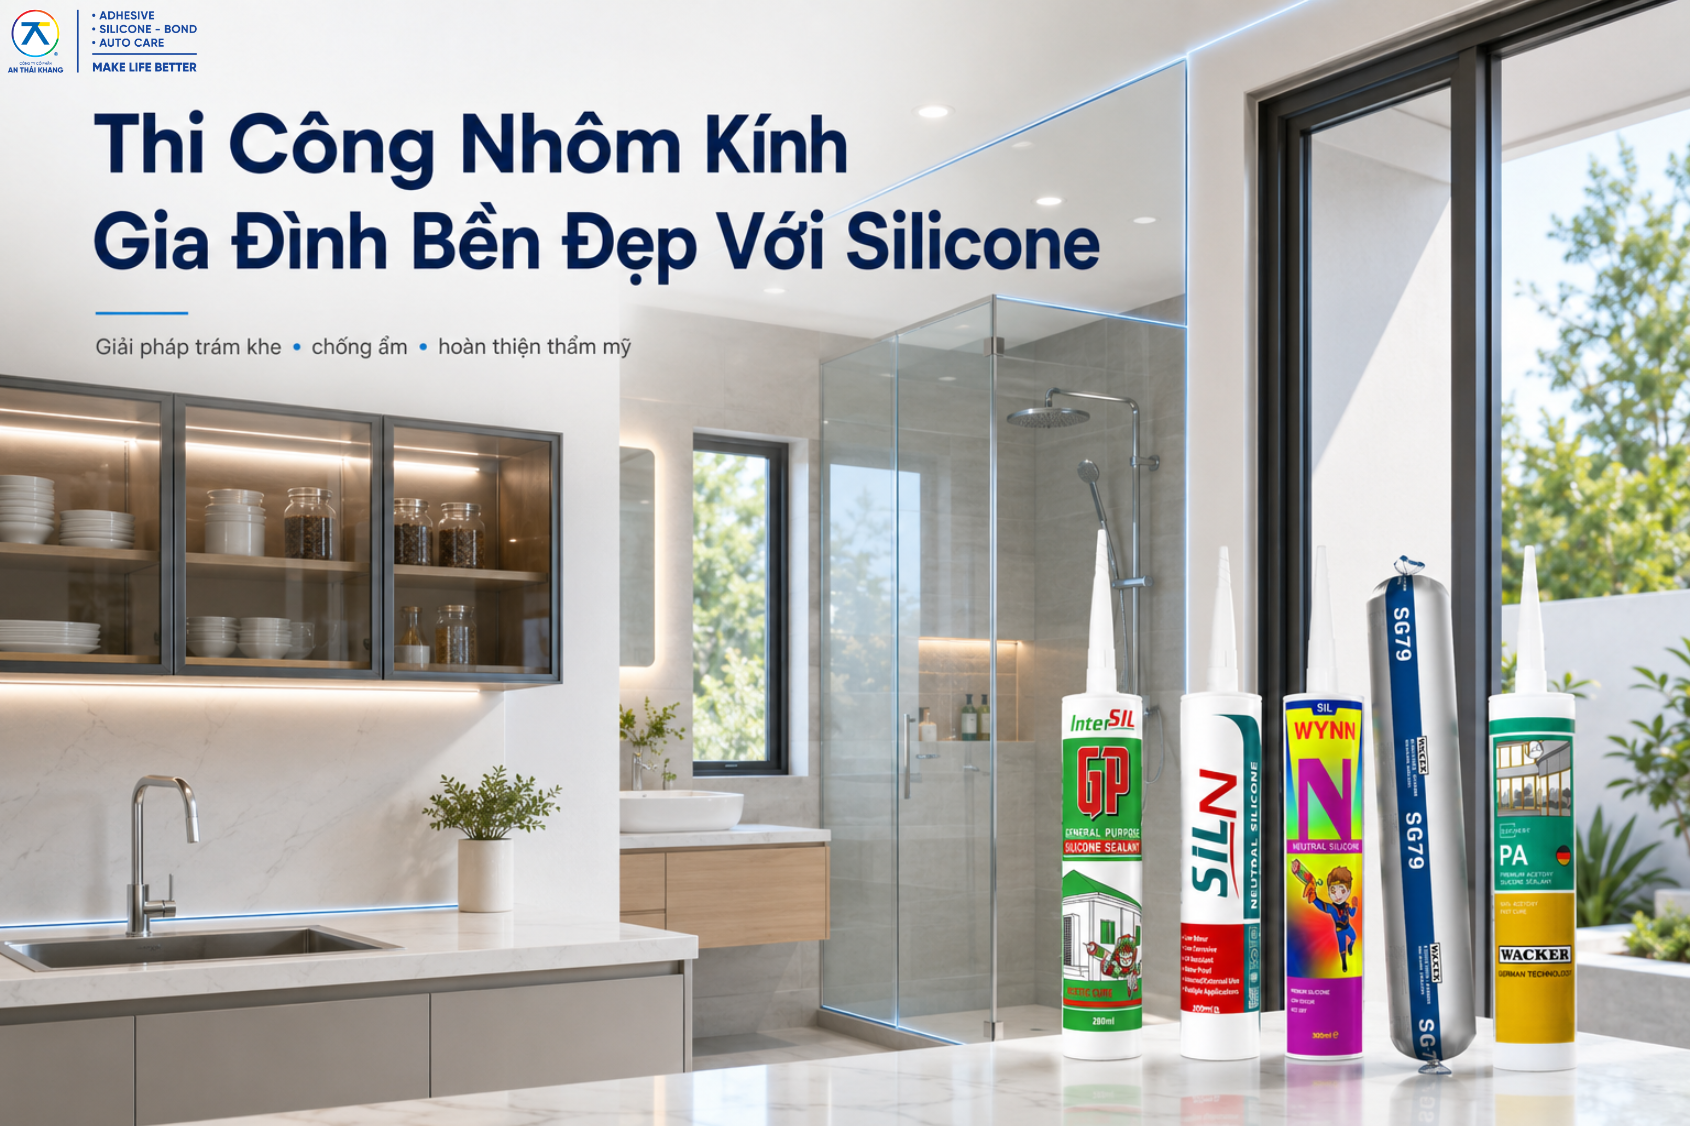
Acid-cure silicone is commonly suitable for non-porous surfaces such as glass, ceramic tiles, and many general-purpose sealing applications. This type is generally easy to apply, forms a skin relatively quickly, and is widely used in conventional aluminum and glass installation work.
Neutral-cure silicone offers broader compatibility with aluminum, glass, metals, and various construction materials. Its neutral curing mechanism makes it suitable for applications requiring good compatibility across different substrates.
There are also special-purpose silicones designed for specific requirements such as structural glazing, façades, aquariums, or joints frequently exposed to water. For these applications, the correct function and technical properties should take priority over curing speed alone.
When choosing a silicone, start with three factors:
Material → Application area → Joint requirements
Selecting the correct product from the beginning helps make the application process more efficient and reduces the need for rework after completion.
4. What Should You Do During the First 30 Minutes After Applying Silicone?
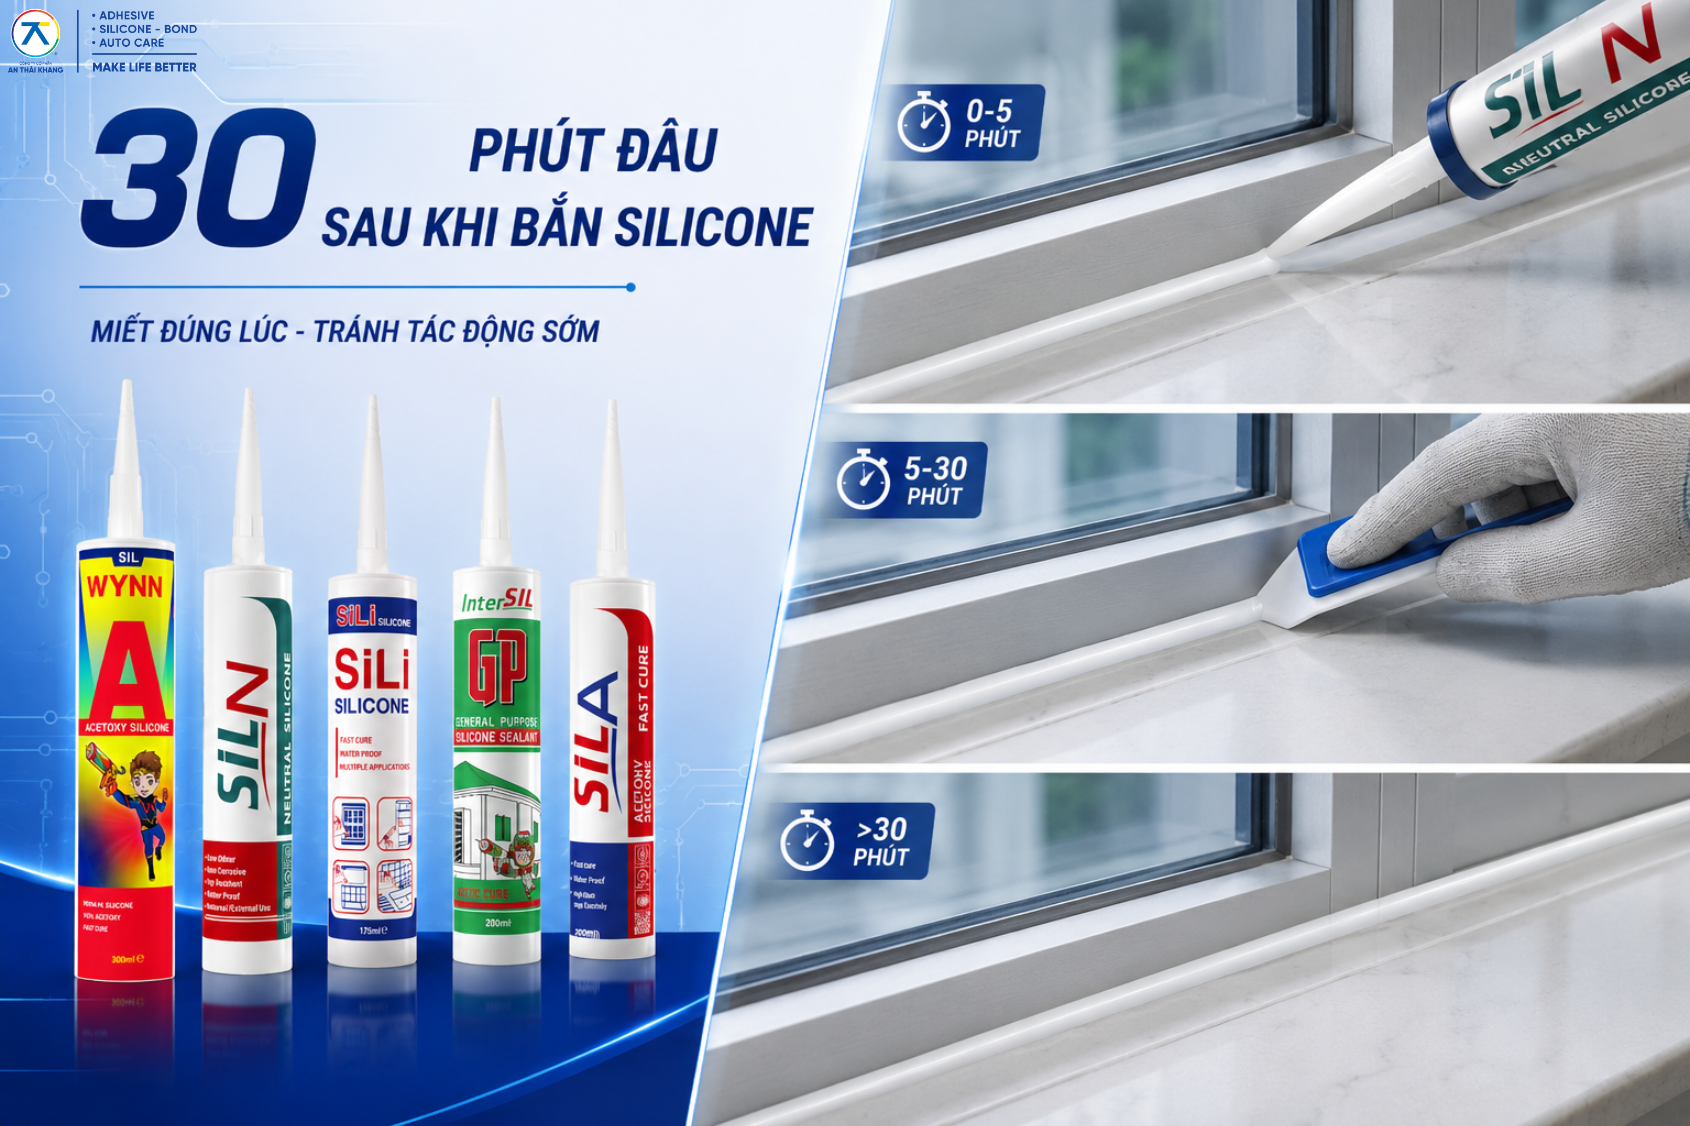
The first period after application has a major influence on the final shape and finish of the silicone bead.
Immediately after extrusion, smooth and shape the bead while the silicone is still within its workable period. Any excess sealant around the edges should also be removed at this stage.
Once the surface begins to form a skin, avoid continued tooling or touching, as this can affect the smoothness of the finished joint. Tooling at the correct time is also important for producing a neat, even silicone bead with minimal smearing.
Afterward, allow the silicone to stabilize naturally and protect it from dust, water, and premature mechanical contact. SIL A, for example, should be protected from water exposure during the first 2 hours after application.
Most importantly, do not use the “surface-dry” time as the point at which the joint can immediately be placed into service. A silicone bead may appear dry after 5–30 minutes while the material inside is still continuing to cure.
The process can be remembered in three stages:
Immediately after application: Finish and shape the bead.
After skin formation: Minimize contact or disturbance.
After full cure: Put the joint into service according to the individual product instructions.
If you want the silicone bead not only to cure properly but also to look straighter, cleaner, and more even, you can also read How to Apply Silicone Neatly and Test Silicone Properly.
5. Conclusion
Helping silicone cure faster does not require a complicated trick. Most of the improvement comes from what is done before and during application.
The seven key factors can be summarized as:
Choose the right silicone → Clean the surface → Apply the correct amount → Tool at the right time → Maintain a suitable temperature → Keep the area ventilated → Use properly stored silicone
Most importantly, it is necessary to distinguish between surface drying and full curing. A silicone bead that has already formed a skin does not necessarily mean that it is ready for water exposure, mechanical loading, or immediate use.
Acid-cure silicone, neutral-cure silicone, and special-purpose silicone have different curing characteristics and application ranges. Product selection should therefore be based on the substrate, installation area, and actual performance requirements rather than curing speed alone.
The most effective way to help silicone cure faster is not to force it to dry as quickly as possible, but to provide the proper conditions for the sealant to cure at the correct rate, with the correct application technique, while maintaining the quality and performance of the finished joint.
AN THAI KHANG JSC
- • Fanpage: An Thái Khang JSC
- • Hotline: 0764 644 245
- • Email: support@anthaikhang.com
- • Website: https://anthaikhang.com/